Blog
All Blog Posts | Next Post | Previous Post

 TMS WEB Core v1.2 preview: New Electron application support
Wednesday, February 20, 2019
A few months ago we have started our experimental work with Electron. After the working proof of concept, our goal was to wrap as many Electron API for the Delphi developers as possible. But of course it's not just the Electron API that can be used, you can easily transfer your already existing code to make it a desktop application! We have already given a small teaser about this in a previous blog post.Right now we would like to take the opportunity to give a bit more insight on the new upcoming TMS Web Electron Application support.
IDE integration
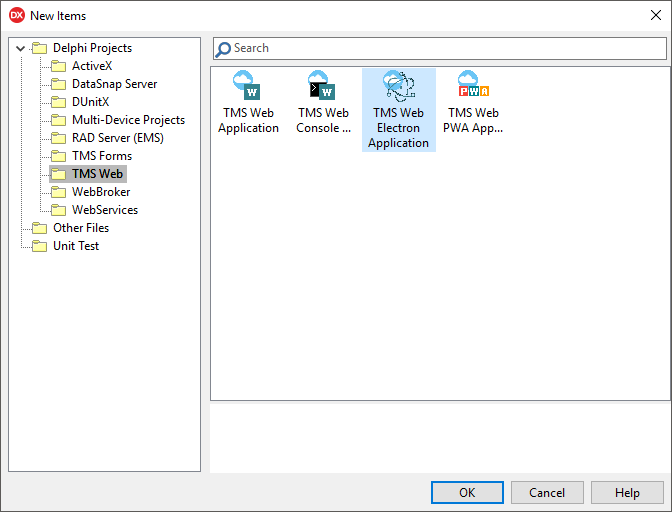
You are probably already familiar with creating a TMS Web Application or a progressive web application. The procedure is identical, and all you have to do to create a new Electron application is to select the TMS Web Electron Application from the wizard:
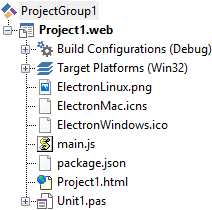
It generates a project similar to a TMS Web PWA Application, but instead of the manifest and serviceworker files, it has generated a main JavaScript file, a package file and 3 icons for the different platforms. Both the default generated package.json and main.js are capable of creating, running and packaging an application, but they can be further customized by editing them. The icon files can also be changed through the project options.
You can now develop your application like you would normally do with a TMS Web Application.
Upon pressing F9 in Debug mode, the project will compile as usual, then the Electron engine starts up and launches the application.
When it comes to Build mode, there are little differences and platform limitations. Pressing F9 in Windows 32/64-bit Build mode will package the application and launch it. Pressing F9 in Linux 32/64-bit Build mode will create the packaged application for Linux, which then can be moved onto a Linux machine and launched. While macOS 32/64-bit Build mode is added, unfortunately currently it's not possible to create a packaged macOS application from a Windows machine. But the good news is that a packaged macOS 64-bit application still can be made by copying the source files to a prepared Mac machine, and running a single command. Not to mention that if you would like to distribute a macOS application, then it's recommended to sign it, which can only be done on a Mac.
Creating a photo editor application
Electron provides a way for TMS Web Applications to create cross-platform (Windows/macOS/Linux) desktop applications and to use native operating system calls and directly access the local file system. So we would like to show the power of this by creating a basic photo editor application.
To keep this simple for now, we are only going to allow to apply filters on a selected photo through the CSS filter property, which is already an easier and faster approach than writing it for example in VCL since image filters like blur, contrast, gray-scale ... are not out of the box available in VCL . As a first step we add every component we will need in our photo editor.
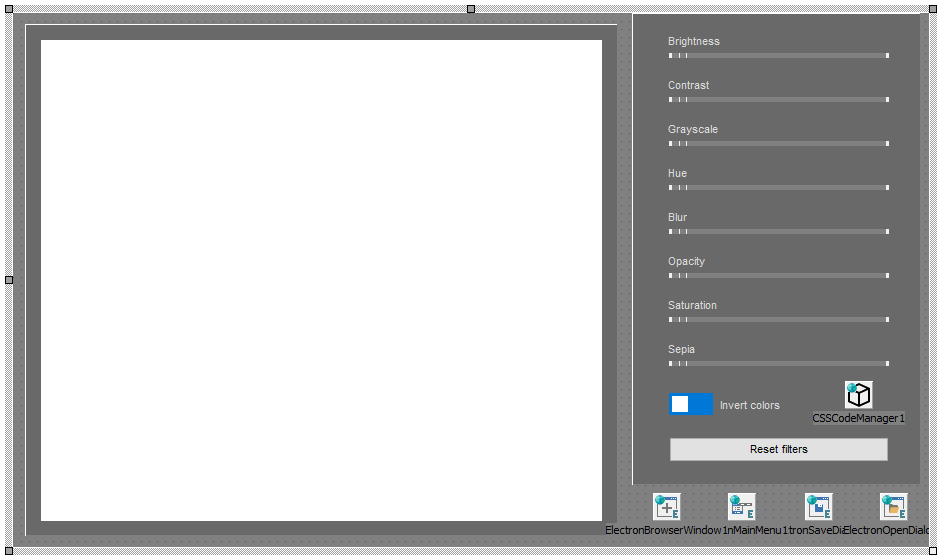
Of course we cannot edit an image if we don't have an image. To tackle this problem, we are going to use TWebImageControl, TElectronMainMenu and TElectronOpenDialog. With TElectronMainMenu we can add a menu bar with menu items such as 'Open' or 'Save as...'. In the OnClick event of the Open menu item, we can then execute the TElectronOpenDialog and use the retrieved file name to load the image from the local file system.
procedure TForm1.Open1Click(Sender: TObject);
begin
  if ElectronOpenDialog1.Execute then
  begin
    WebImageControl1.Picture.LoadFromFile(ElectronOpenDialog1.FileName);
  end;
end;procedure TForm1.WebFormCreate(Sender: TObject); begin FImgEl := TJSHTMLElement(document.getElementById(WebImageControl1.ElementID)); end;
procedure TForm1.BrightnessTBChange(Sender: TObject);
begin
  FBrightnessFilter := ' brightness(' + IntToStr(BrightnessTB.Position) + '%)';
  CreateFilter;
end;

procedure TForm1.CreateFilter;
begin
  FFilter := FBlurFilter + FBrightnessFilter + FContrastFilter + FGrayscaleFilter + FHueRotateFilter + FInvertFilter + FOpacityFilter + FSaturateFilter + FSepiaFilter;
  FImgEl.style.setProperty('filter', FFilter);
end;This was not complex so far, and our application is already almost complete, but the saving feature is still missing. For that, we are going to use TElectronSaveDialog, TElectronBinaryDataStream and TJSHTMLCanvasElement.
We can add a 'Save as...' menu item to our menu bar just as we did with the 'Open' menu item, then in the OnClick event we are going to write the logic to the image saving.
procedure TForm1.Save1Click(Sender: TObject);
begin
  if ElectronSaveDialog1.Execute then
  begin
    //save image
  end;
end;There are 5 steps we need to take: retrieve our image as a TJSHTMLCanvasElement, create a new TJSHTMLCanvasElement for rendering, assign the filters to our new canvas's context, render the image, and save it to the file in the local file system. Assigning the filter will require some JavaScript, but as you'll see in the code below, it's an insignificant amount for a great result. To achieve the actual saving of the image, we are going to use TElectronBinaryDataStream. TElectronBinaryDataStream has a property called Base64, so all we have to do is assign the dataURL from our canvas to it, and then call the SaveToFile method. By now the code looks something like this:
procedure TForm1.Save1Click(Sender: TObject);
var
  canvas, el: TJSHTMLCanvasElement;
  ctx: TJSCanvasRenderingContext2D;
  bd: TElectronBinaryDataStream;
  w, h: Integer;
begin
  if ElectronSaveDialog1.Execute then
  begin
    //1: get image as TJSHTMLCanvasElement
    el := TJSHTMLCanvasElement(document.getElementById(WebImageControl1.ElementID));
    asm
      w = el.naturalWidth;
      h = el.naturalHeight;
    end;
    //2: create the canvas element
    canvas := TJSHTMLCanvasElement(document.createElement('canvas'));
    canvas.width := w;
    canvas.height := h;
    ctx := canvas.getContextAs2DContext('2d');
    asm
      ctx.fillStyle = "rgba(255, 255, 255, 0.0)"; //set a transparent background
      ctx.filter = el.style.filter; //3: add the filter
    end;
    ctx.fillRect(0, 0, w, h);
    //4: render our image
    ctx.drawImage(TJSObject(el), 0, 0, w, h);

    //5: save to file
    bd := TElectronBinaryDataStream.Create;
    bd.Base64 := canvas.toDataURL;
    bd.SaveToFile(ElectronSaveDialog1.FileName);
  end;
end;After modifying our 'Save as...' menu item by setting it to be disabled by default, we can do the following to enable it after the first image has been opened:
procedure TForm1.WebFormCreate(Sender: TObject);
begin
  FImgEmpty := True;  //flag
  FImgEl := TJSHTMLElement(document.getElementById(WebImageControl1.ElementID));
end;

procedure TForm1.Open1Click(Sender: TObject);
begin
  if ElectronOpenDialog1.Execute then
  begin
    WebImageControl1.Picture.LoadFromFile(ElectronOpenDialog1.FileName);
    if FImgEmpty then
    begin
      Save1.Enabled := True;
      ElectronMainMenu1.EndUpdate;
      FImgEmpty := False;
    end;
  end;
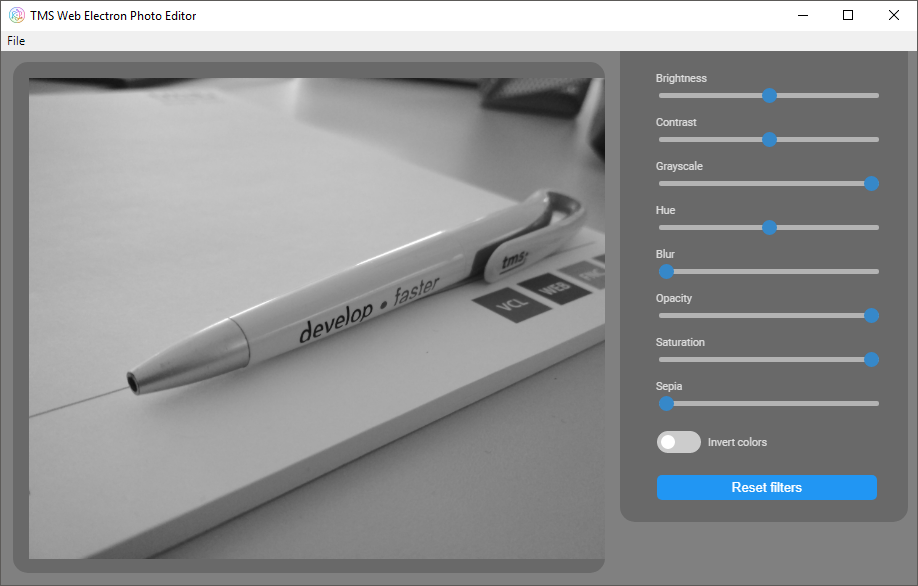
end;With this last small addition, we can say that we have created a basic and simple cross platform photo editor application that is capable of:
- opening a local file system image via a native open dialog
- applying filters using CSS
- and saving images to the local file system via a native save dialog.
And of course it's running on the 3 major operating systems: Windows, macOS and Linux using a single source code-base!
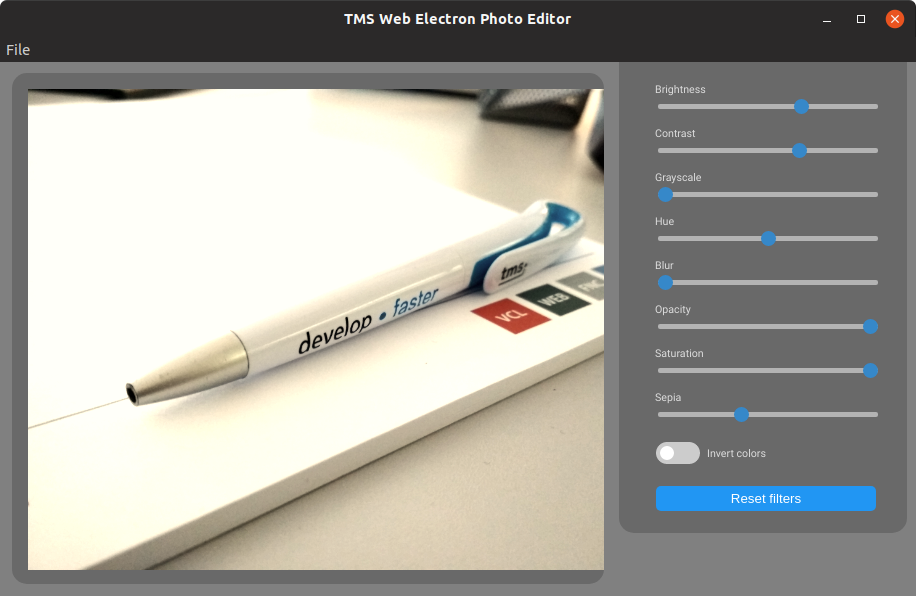
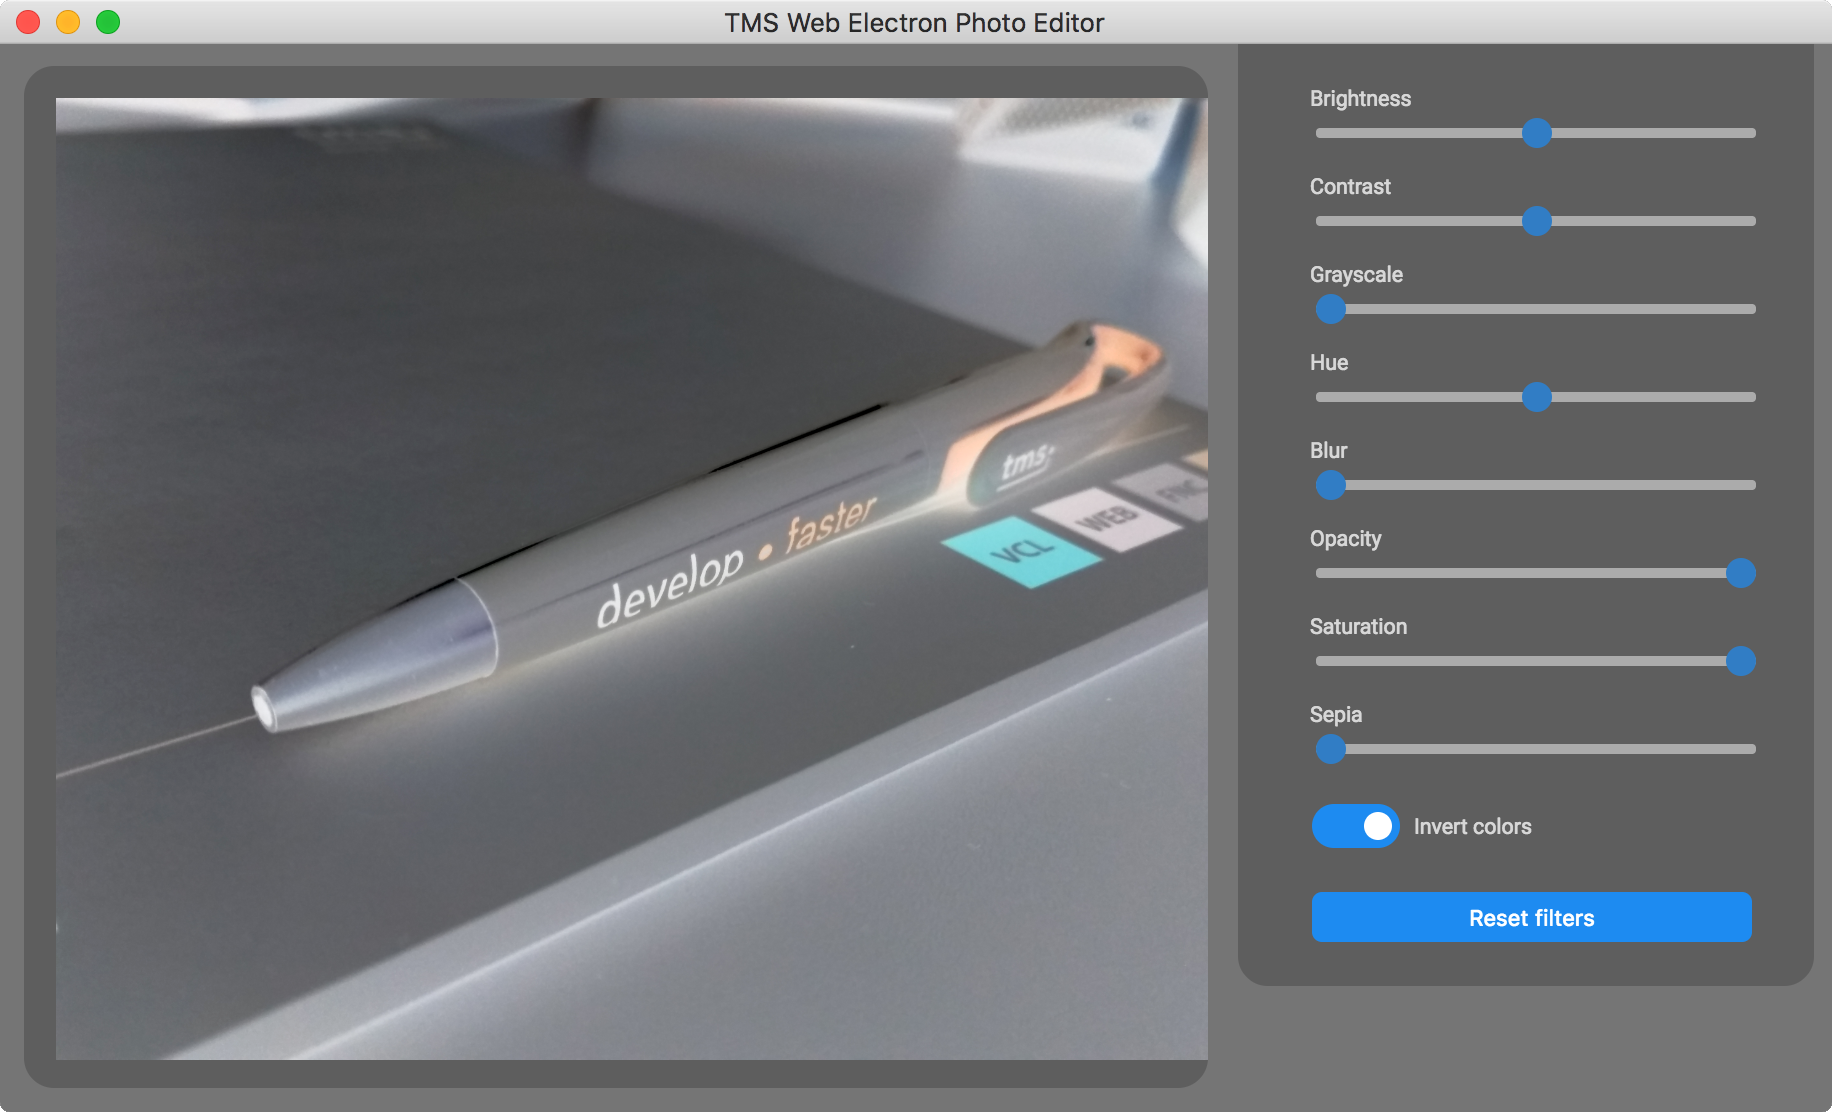
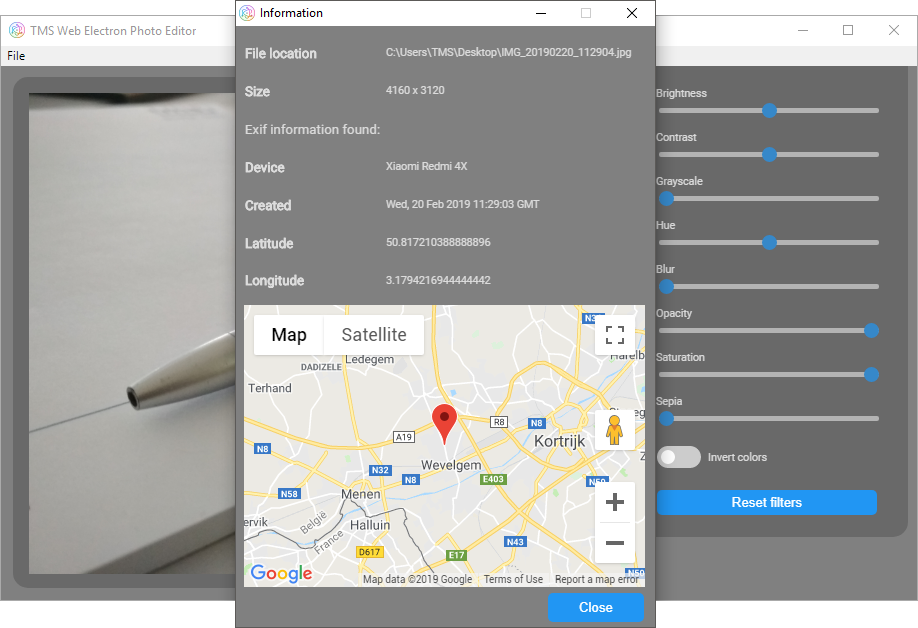
If this already got you excited, then we have more good news: further functionality such as extracting photo EXIF information from a JPEG and display it in a child window will be available in our Electron PhotoEditor demo. For extracting the EXIF information from JPEG file, an existing JavaScript library is used, giving us this functionality in a matter of minutes as we can easily consume this JavaScript library from a TMS WEB Core application. From the EXIF information, we can extract the geocoordinates where the picture was taken. The power & flexibility of TMS WEB Core enables us to visualize this on a map using the TWebGoogleMaps component. Again, goal and feature achieved in a matter of a few minutes and a minimum lines of code.
Building cross platform Electron application support is going to be the part of the TMS WEB Core v1.2 Padua release, and soon we are going to provide the first BETA to TMS ALL-ACCESS users! Don't miss out and get started today with TMS WEB Core! You can download the trial version that is generally available, go ahead with the standalone version you purchased or with TMS WEB Core and additional tools that are all included in TMS ALL-ACCESS. Our team looks forward to all your comments, feedback, feature-requests to help steering the development of TMS WEB Core to the next stages!
Tunde Keller

This blog post has received 4 comments.
 2. Thursday, February 21, 2019 at 7:01:09 PM
Awesome, just waiting for it to arrive on Lazarus
Sandoval Vargas Moctezuma
 3. Thursday, March 7, 2019 at 11:32:42 PM
Please, add to your first demo also such functions as Crop image, Blur selected segment, Fill selected segment with color, Resize image - this is basic image editor functions
Ruslan
 4. Tuesday, June 4, 2019 at 5:19:24 PM
A brilliant move, definitely.
4. Tuesday, June 4, 2019 at 5:19:24 PM
A brilliant move, definitely.Many of Microsoft’s latest developments (Visual Studio Code, Skype, Teams, …) are electron-apps.
Peter Bossier
All Blog Posts | Next Post | Previous Post
This is a very very smart move.
keep up this great work.
PS : I was hopping to see Tms web core responsive design components , that would be just a killer feature.
Regards
José
Morango Jose