Blog
All Blog Posts | Next Post | Previous Post

 Igniting the passion for Delphi for future generations
Tuesday, February 12, 2019
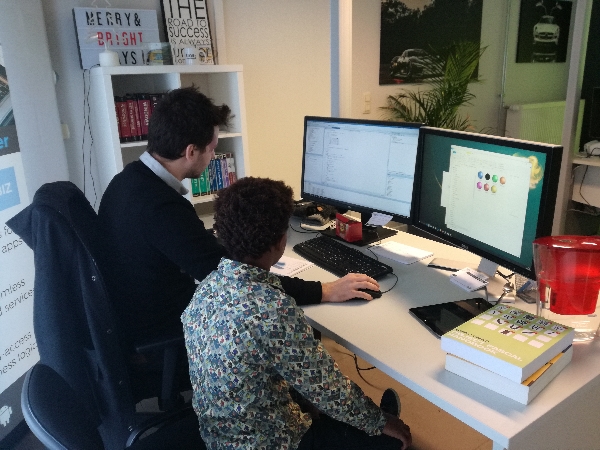 A local school in the town where the TMS office is located organized last week for the kids a project where they could experience an entire day in a working place they dream of for their future career.
We had the pleasure to welcome Obama in our office. Obama is an 11-year-old boy who would love to become a software developer. We at TMS Software offered him the opportunity to follow us for a day and see what it takes to be a software developer. To inspire Obama and raise the interest of the next generation, we wanted to show Obama what a great variety of platforms we could tackle with our beloved tool Delphi and our frameworks. And what better way to captivate the youth then to create a game?
We choose the code-breaking game Mastermind that was invented in 1970 by Mordecai Meirowitz.
For those who don’t know the game, the purpose is to guess the code created by your opponent, or in this case the computer, by using four colored pegs. There are six colors to choose from and after each guess the opponent gives feedback on how many colors are correct and how many colored pegs are in the right position. In our game we decided that the red mark would indicate that the peg was in the correct place and a white mark if the color was used in the code, but not on the position you’ve guessed. To make it a little easier, we’ve also made sure that the colors are only used once and no empty spots are in the pattern.
If you already want to play our game before we explain how everything works, you can do this at www.tmssoftware.com/MasterMind.
As we wanted to show the power of our components and use it on almost every platform on the planet, it was a logical choice to work with our FNC components. This way we can use the same codebase to create a VCL, FMX and web application. A progressive web application to be precise. The advantages for a PWA application are clear:
- The application has a responsive design, this means that it adapts automatically to the device screen so it looks good on mobile and desktop.
- It is aware of
- You can install the application on mobile devices and Chrome OS, without going to a censored application store.
- It looks like a native application running full-screen with access to the hardware.
The only remark here is that it should initially be accessed via HTTPS. As you can see on both pictures below an example where you can see the web application on the left and then the downloaded app on the right which is launched as installed app and is running full-screen and offline.
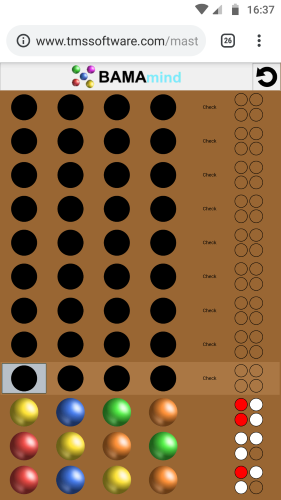
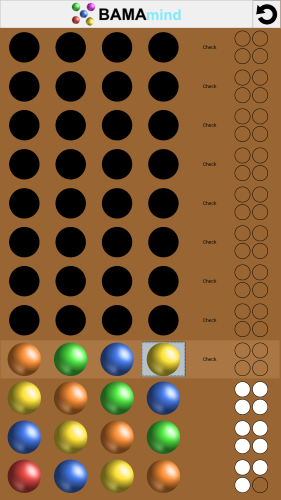
So, a TMS web progressive web application is the best way to let Obama show what he built to all of his friends and family. It is as easy as sharing the link to play the game in an internet browser and you can also download and install it on your phone or tablet to have it available even when you are offline or want to save some mobile data.
To put the icing on the cake, we didn’t just create the game as progressive web application. This served also as a proof of concept to create a TMS Electron project created in Delphi from the same source code! This technology is in development in our lab and this will be part of the TMS WEB Core 1.2 Padua release. It allowed us to have an out-of-the-box working and installable desktop application for Windows, macOS (macOS 64-bit app to be precise), and on Linux in a matter of minutes. Here are some screenshots of this cross platform TMS Electron desktop application on Windows, macOS and Ubuntu. As we guess that many of you are eager to work with this awesome technology, we are working hard to make a TMS WEB Core 1.2 Padua Beta release available as soon as possible to our TMS ALL-ACCESS users.
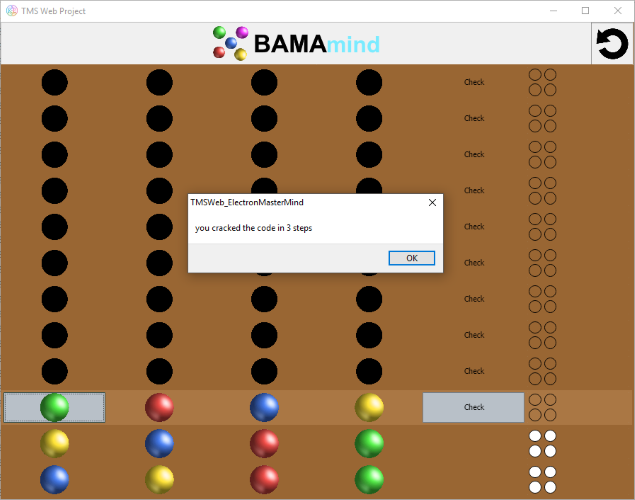
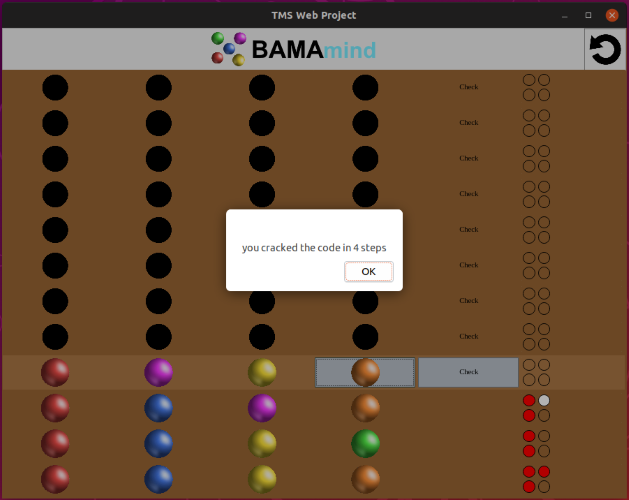
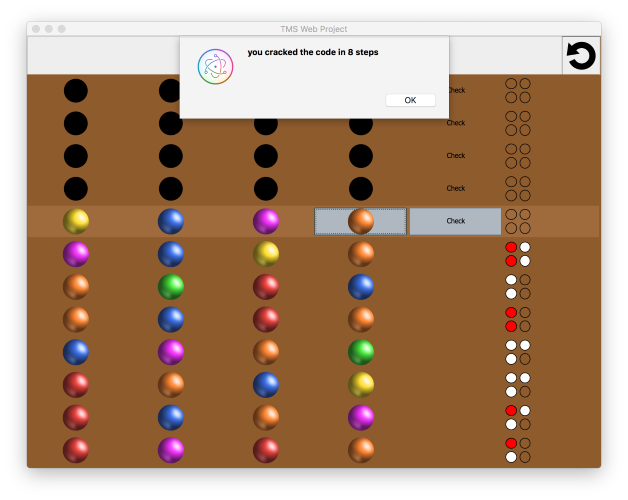
Now to get to the programming. We started with the idea to create a control for one entry containing the four colored pins, a check button and the four markers that evaluate your guess.
A quick look in the wide range of FNC UI components we’ve already available, taught us that the TTMSFNCBitmapSelector looks the most similar component to what we want to create. So we took the custom FNC component this TTMSFNCBitmapSelector was derived from and started with the TTMSFNCDefaultSelector. This would be the basis for our FNC UI component TTMSFNCMasterMindControl. We built the board by creating 12 of our UI controls and placed them underneath each other with the use of top align.
It took us no effort to evenly space everything horizontally or to scale everything when the window is resized, as this is already done in the class TTMSFNCDefaultSelector. We just had to draw our images and the first line was already visible on our screen.

To get a little more in detail. We’ve created one row with five columns, where we use images to draw the four pegs with one TTMSFNCBitmapContainer, which contains the images for all the colors. The public property DataInteger that exists for every TTMSFNCCustomSelectorItem in the TTMSFNCDefaultSelector is used to hold the value of the selected color. The “Check” is just text shown in the item and the four check markers are drawn via TTMSFNCGraphics, where we just calculate the optimal size to draw four circles and fill the color of the ellipsis according to the number of correct pegs.
Then we checked how the interaction with mouse, keyboard and touch could be realized to ensure the game can be played on a variety of devices. With mouse or touch, consecutive clicks on each of the 4 positions cycles through the colors. We’ve added navigation between positions with the left and right arrow keys and cycling through color per position with arrow up and down. This UI behavior was again fairly easy to implement due to the fact that most of the behavior was already in the superclass.
We use the left and right arrow keys to navigate within our own control and as you can see below, you have the prove that this is very simple as the GetPreviousSelectableItem and GetNextSelectableItem are both functions from the TTMSFNCCustomSelector.
procedure TTMSFNCMasterMindControl.HandleKeyDown(var Key: Word;
  Shift: TShiftState);
var
  dataInt: NativeInt;
begin
  case Key of
    KEY_LEFT: SelectedItemIndex := GetPreviousSelectableItem;
    KEY_RIGHT: SelectedItemIndex := GetNextSelectableItem;
    KEY_UP:
      begin
        if (SelectedItemIndex >= 0) and (Items.Items[SelectedItemIndex].DataString = 'image') then
        begin
          dataInt := 1 + Items[SelectedItemIndex].DataInteger;
          if (dataInt > 6)then
            dataInt := 1;
          Items[SelectedItemIndex].DataInteger := dataInt;
          Invalidate;
        end;
      end;
      ….

end;
The code to change the peg color from the mouse up handler override is:
procedure TTMSFNCMasterMindControl.HandleMouseUp(Button: TTMSFNCMouseButton;
  Shift: TShiftState; X, Y: Single);
var
  dataInt: NativeInt;
begin
  if Enabled then
  begin
    inherited;
    if (SelectedItemIndex >= 0) and (Items.Items[SelectedItemIndex].DataString = 'image') then
    begin
      dataInt := 1 + Items[SelectedItemIndex].DataInteger;
      if (dataInt > 6)then
        dataInt := 1;
      Items[SelectedItemIndex].DataInteger := dataInt;
      Invalidate;
  end;
end;
We use the up and down keys to change the public DataInteger property of the selected item of type TTMSFNCCustomSelectorItem which changes the bitmap image of the selected peg in our DrawItemContent function. The code is:
procedure TTMSFNCMasterMindControl.DrawItemContent(AGraphics: TTMSFNCGraphics;
  ADisplayItem: TTMSFNCCustomSelectorDisplayItem);
var
  di: TTMSFNCCustomSelectorItem;
  idx: Integer;
  bmp: TTMSFNCBitmap;
  pt1: TPointF;
  checkPinsRect: TRectF;
  side: Single;
  i: Integer;
  tempPCorrect: Integer;
  tempCCorrect: Integer;
  w, h: Single;
  s: string;
begin
  inherited;
  di := ADisplayItem.Item;
  // draw the peg using a bitmapcontainer image
  if Assigned(di) and (di.DataString = 'image') then
  begin
    idx := di.DataInteger;
    AGraphics.BitmapContainer := BitmapContainer;
      case idx of
        1: s := 'red';
        2: s := 'blue';
        3: s := 'yellow';
        4: s := 'orange';
        5: s := 'green';
        6: s := 'purple';
        else s := 'empty';
      end;
    AGraphics.DrawBitmapWithName(ADisplayItem.Rect, s);
  end;
  // draw the score
  if Assigned(di) and (di.DataString = 'check') then
  begin
    w := ADisplayItem.Rect.Right - ADisplayItem.Rect.Left;
    h := ADisplayItem.Rect.Bottom - ADisplayItem.Rect.Top;
     if(w < h) then
       side := w / 2
     else
       side := h / 2;
     tempPCorrect := FPosCorrect;
     tempCCorrect := FColorCorrect;
     // retrieve scores
     for i := 0 to 3 do
     begin
       if(tempPCorrect > 0) then
       begin
         FTColors[i]:= gcRed;
         Dec(tempPCorrect);
       end
       else if (tempCCorrect > 0) then
       begin
         FTColors[i] := gcWhite;
         Dec(tempCCorrect);
       end
       else
         FTColors[i] := gcNull;
     end;
     // Mastermind row is active, so use active color
     if (Enabled = true) or (FPosCorrect = 4) then
     begin
       AGraphics.Fill.Color := activeColor;
       AGraphics.Stroke.Color := activeColor;
     end
     else
     begin
       AGraphics.Fill.Color := boardcolor;
       AGraphics.Stroke.Color := boardcolor;
     end;
     // draw 4 score circles in correct score color
     AGraphics.DrawRectangle(ADisplayItem.Rect);
     AGraphics.Stroke.Color := gcBlack;
     checkPinsRect := RectF(ADisplayItem.Rect.Left + 2, ADisplayItem.Rect.Top + 2, ADisplayItem.Rect.Left + side - 2, ADisplayItem.Rect.Top + side - 2);
     AGraphics.Fill.Color := FTColors[0];
     AGraphics.DrawEllipse(checkPinsRect);
     checkPinsRect := RectF(ADisplayItem.Rect.Left + 2, ADisplayItem.Rect.Top + side + 2, ADisplayItem.Rect.Left + side - 2, ADisplayItem.Rect.Top + (side * 2) - 2);
     AGraphics.Fill.Color := FTColors[1];
     AGraphics.DrawEllipse(checkPinsRect);
     checkPinsRect := RectF(ADisplayItem.Rect.Left + side + 2, ADisplayItem.Rect.Top + 2,  ADisplayItem.Rect.Left + (side*2) - 2, ADisplayItem.Rect.Top + side - 2);
     AGraphics.Fill.Color := FTColors[2];
     AGraphics.DrawEllipse(checkPinsRect);
     checkPinsRect := RectF(ADisplayItem.Rect.Left + side + 2, ADisplayItem.Rect.Top + side + 2, ADisplayItem.Rect.Left + (side*2) - 2, ADisplayItem.Rect.Top + (side * 2) - 2);
     AGraphics.Fill.Color := FTColors[3];
     AGraphics.DrawEllipse(checkPinsRect);
  end;
end;
As a last part we just had to implement some code to check the pattern and return an event if we did a guess. We then disable the FNC UI control for the active row on the board and enable the next row so we can move to the next step.
And that’s all for the component used in the game. Now we just have to create the form of the progressive web and Electron application and everyone can play the game anywhere, anytime. Just to show the power and the time we gained by using one of our custom FNC components, we’ve also created a VCL and FireMonkey application with the same code.
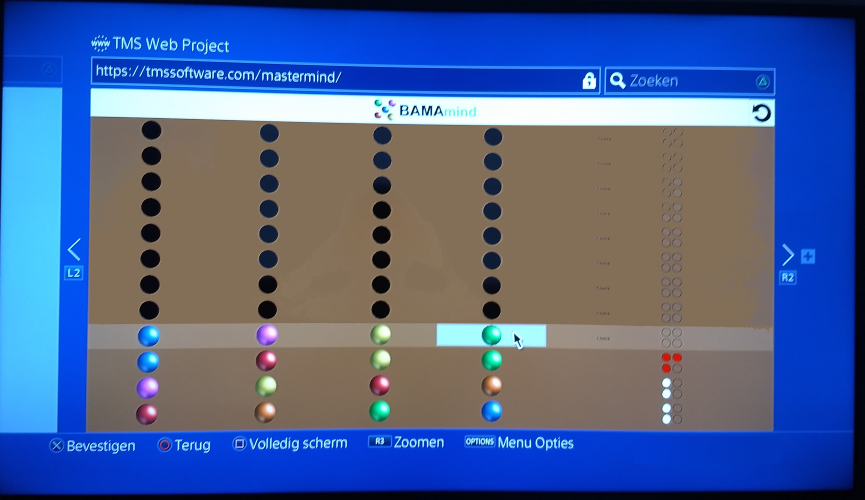
To conclude, Obama was very proud of the game he helped creating and named ‘oBama mind’ and he showed it to all of his classmates. We hope that this way, he could transmit the passion for software development to his classmates and inspire a future generation of Delphi developers. To illustrate the scope of this type of development with TMS WEB Core, Obama even showed it to his friends on his PlayStation 4, where you can play it on the built-in web browser. He said that now he is even more certain he wants to become a software developer!
We are one step closer to a future where Pascal programming is guaranteed.
The full source code for the Mastermind game that you can compile as VCL, FMX or Web core application is available for download.
As soon as TMS WEB Core v1.2 Padua will be released, you will also be able to compile it as an Electron Windows, macOS or Linux desktop application.
Gjalt Vanhouwaert

This blog post has not received any comments yet.
All Blog Posts | Next Post | Previous Post