Blog
All Blog Posts | Next Post | Previous Post

 Plug the StellarDS.io REST-API into a JavaScript grid in 15 minutes
Thursday, September 26, 2024
At StellarDS.io, our goal is to enable creating web & native apps with central data in the back-end as quick and easy as possible. To demonstrate this, we integrated StellarDS.io with a popular JavaScript grid library to see how seamless the process could be. For this blog post, we chose the Grid.js library, and had everything up and running in about 15 minutes.

Step 1: Create Tables
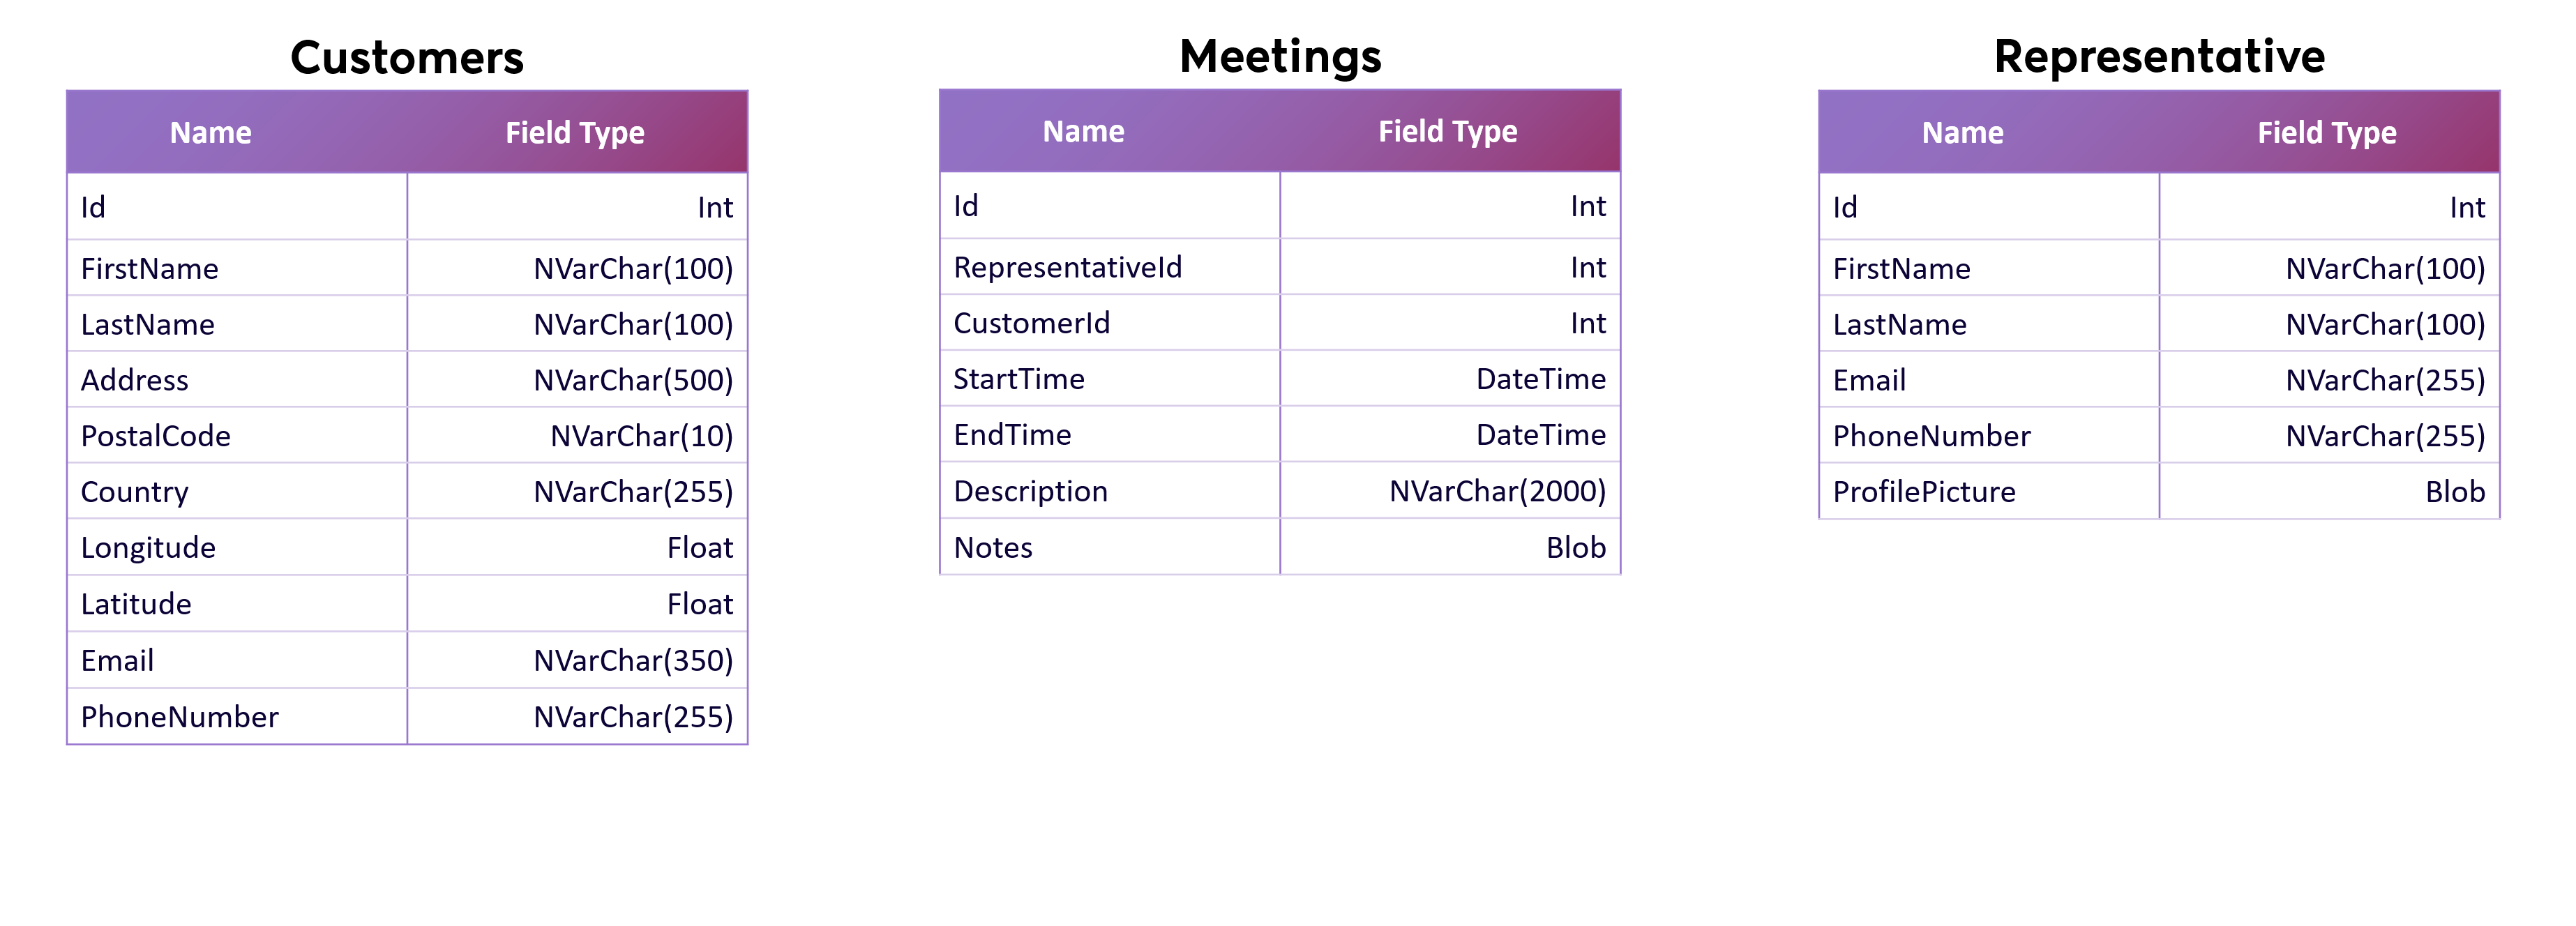
The first step is to create the necessary tables. For this demo, we created tables for meetings, representatives, and customers, as shown below:

We populated the tables with mock data to visualize the responses.
Step 2: Initialize the Project and Add Grid.js
Next, we created a simple project and added Grid.js, following the documentation. To get started, we initialized a grid and provided the URL to fetch our data. We also added a join query to retrieve customer and representative information for each meeting. Here's how you can do it:
const grid = new gridjs.Grid({
    columns: [
        { name: "Representative" },
        { name: "Customer" },
        { name: "Start time" },
        { name: "End time" },
        { name: "Address" },
        { name: "Postal code" },
        { name: "Country" }
    ],
    server: {
        url: "https://api.stellards.io/v1/data/table?joinquery=customers;id=meetings;customerid%26meetings;representativeid=representatives;id&table=88&project=" + projectId,
        headers: {
            'Authorization': 'Bearer ' + token
        },
        handle: (res) => {
            if (res.status === 404) return { data: [] };
            if (res.ok) return res.json();
        },
        then: data => data.data.map(meeting => [
            meeting.RepresentativesFirstName + ' ' + meeting.RepresentativesLastName,
            meeting.CustomersFirstName + ' ' + meeting.CustomersLastName,
            meeting.StartTime,
            meeting.EndTime,
            meeting.CustomersAddress,
            meeting.CustomersPostalCode,
            meeting.CustomersCountry
        ]),
        total: data => data.count
    }
}).render(document.getElementById("wrapper"));
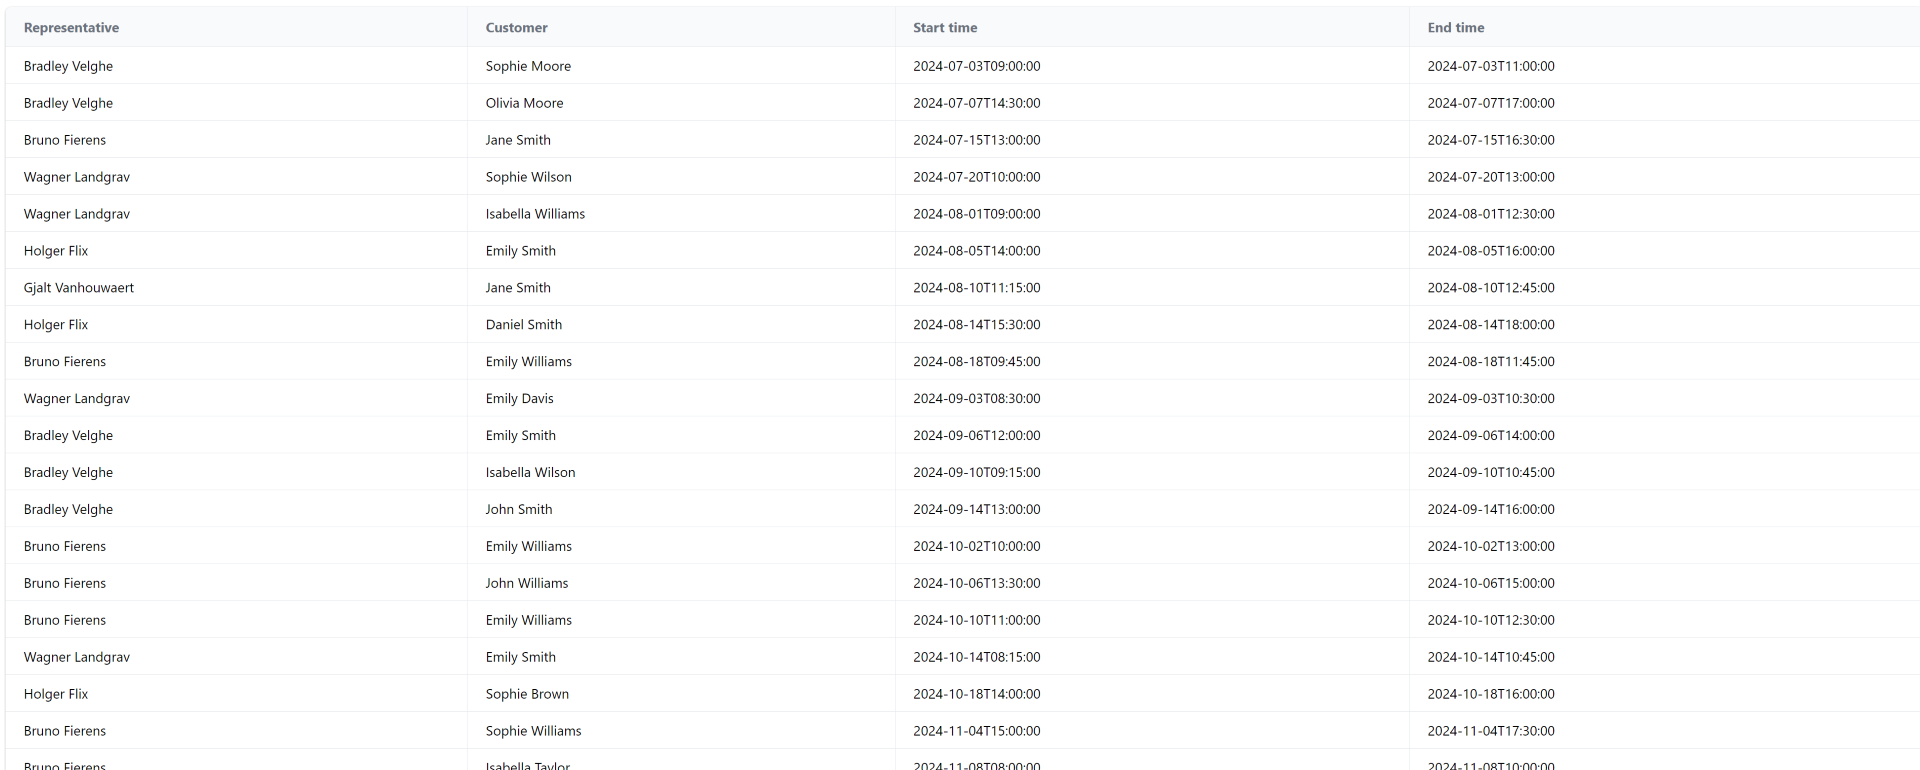
In this setup, we pass the authorization header and handle the response, mapping the returned data to the corresponding columns. Finally, we render it in a <div> element, and that’s it! The grid is now fully functional.

Expanding the Demo: Pagination and Sorting
Since we had extra time, we also implemented pagination and sorting using Grid.js’s built-in features.
For pagination, we followed the documentation and added the following code:
pagination: {
    limit: 20,
    summary: false,
    server: {
        url: (prev, page, limit) => `${prev}&take=${limit}&offset=${page * limit}`
    }
}
This limits the number of items per page to 20 and appends the appropriate parameters to the URL to manage pagination.
For sorting, we adapted an example from the documentation to match StellarDS’s sort query format. Here's the final result:
sort: {
    multiColumn: false,
    server: {
        url: (prev, columns) => {
            if (!columns.length) return prev;

            const col = columns[0];
            const dir = col.direction === 1 ? 'asc' : 'desc';
            let colName = ['Representative.FirstName', 'Customer.FirstName', 'StartTime', 'EndTime', 'Customer.Address', 'Customer.PostalCode', 'Customer.Country'][col.index];

            return `${prev}&sortquery=${colName};${dir}`;
        }
    }
}
With pagination and sorting in place, the grid now looks like this:

If you'd like to experiment with this demo, you can download it here: grid.js stellards.io demo
Conclusion
We’re really pleased with the results. It didn’t take long to learn how to use Grid.js, and once we got started, everything was smooth and efficient. By simply passing the URL, the grid handles all requests for us—no need to manually use the Fetch API or other REST API libraries. StellarDS.io and Grid.js make a powerful combination for handling data grids effortlessly.
Launch Offer!
To celebrate the launch of StellarDS.io we are offering a 10% discount on your first year when purchasing a yearly license or a 10% discount for the first 6 months when purchasing a monthly license.
Use code LAUNCHYEAR or LAUNCHMONTH respectively at checkout to apply the discount.
Bradley Velghe

This blog post has not received any comments yet.
All Blog Posts | Next Post | Previous Post