Blog
All Blog Posts | Next Post | Previous Post

 Extend TMS WEB Core with JS Libraries with Andrew:
Clipboard Operations
Wednesday, November 8, 2023

The very concept of copy and paste operations, and even their corresponding keyboard shortcuts, Ctrl+C and Ctrl+V, have been around since the early 1970s, with credit going to Larry Tesler, working at Xerox PARC at the time. Today, clipboard operations are standard on virtually every UI that one can interact with. Web browsers are of course no exception here. If a keyboard is available, the same shortcut keys typically work. If there's no keyboard (eg: mobile devices) such operations will be supported in some other way. Unless you happen to be using Safari for iOS 1.0 or 2.0. It took them a while to get around to adding clipboard support initially.
However, while support for clipboard operations is nearly universal, there are some differences in how browsers implement them. And, as is typical for browsers generally, we've got new capabilities along with a host
of issues that we might not have to deal with in other environments. TMS WEB Core apps can of course take
advantage of all of these new capabilities with ease. In this post, we'll be taking a look at how to do just
that. But we'll also run into a few scenarios where things don't necessarily work the way we might expect.
Selection.
In a traditional Delphi VCL app, or most any other non-browser environment, the user is likely going to be
limited in what they can apply clipboard operations to. Components like the VCL's TEdit and TMemo, where input might be
expected, typically support selection automatically, sometimes even when in read-only mode. Other parts of the UI, like
TLabels or TPanels, might also display text but these are generally not user-selectable. In a web browser, this isn't
really the case. A web page can be thought of as a document all its own. And, generally, everything on the page could be
selectable, including the entire page itself.
To help with this, we can apply the "user-select" CSS property to elements, and specify whether their contents can be selected by the user, just as its name implies. While this property is supported in all browsers, there are some differences in how Safari implements it, but for our purposes today, this won't matter all that much. The main difference is that Safari uses a different property name (-webkit-user-select). If we're using Bootstrap in our project, we don't need to worry about that so much as the Bootstrap classes look after these kinds of differences for us.
The typical way to use this CSS property is to apply it to an element with a value of either "none", "auto", or
"all". In the case of "none", naturally the contents of the element will not be selectable. With "all", the
entire contents of the element are selected automatically - an entire paragraph for example - without the
ability to select a subsection of the element. That leaves us with "auto" which works as we normally expect it
to, letting us select part of a sentence or whatever we like out of a larger block of text, for example.
Complicating things a bit, there are (at least) two points worth bringing up right out of the gate. First, unlike other CSS elements, this property isn't necessarily inherited, and whether it is or not might be browser-dependent. Generally, if you apply the CSS property "user-select: none;" to the body element of the page, selection is largely disabled by default for most elements on that page. When developing web apps, this is likely what is desired. Individual elements can then be configured with a different value, and this works as you'd expect.
The second issue is that some elements are likely to always be selectable, such as <textarea> elements (aka TWebMemo
components) or <input> elements (aka TWebEdit components). We can assign whatever user-select values we
like to these, and they'll most likely still be selectable. This is deliberate on the part of the browser.
To demonstrate, we'll create a sample TMS WEB Core app using the Bootstrap template and then add an assortment of elements to the page, with the different user-select options assigned to their ElementClassName properties. The Bootstrap classes are just "user-select-none", "user-select-auto", and "user-select-all".
In our sample, the
TWebMemo and TWebEdit components are set to read-only and, as we can see, they are still selectable regardless
of the user-select classes assigned. For example, if we type Ctrl+A to select everything on the page, the
TWebLabel and TWebImageControl components that have "user-select-none" assigned do not get selected, but
everything else does.
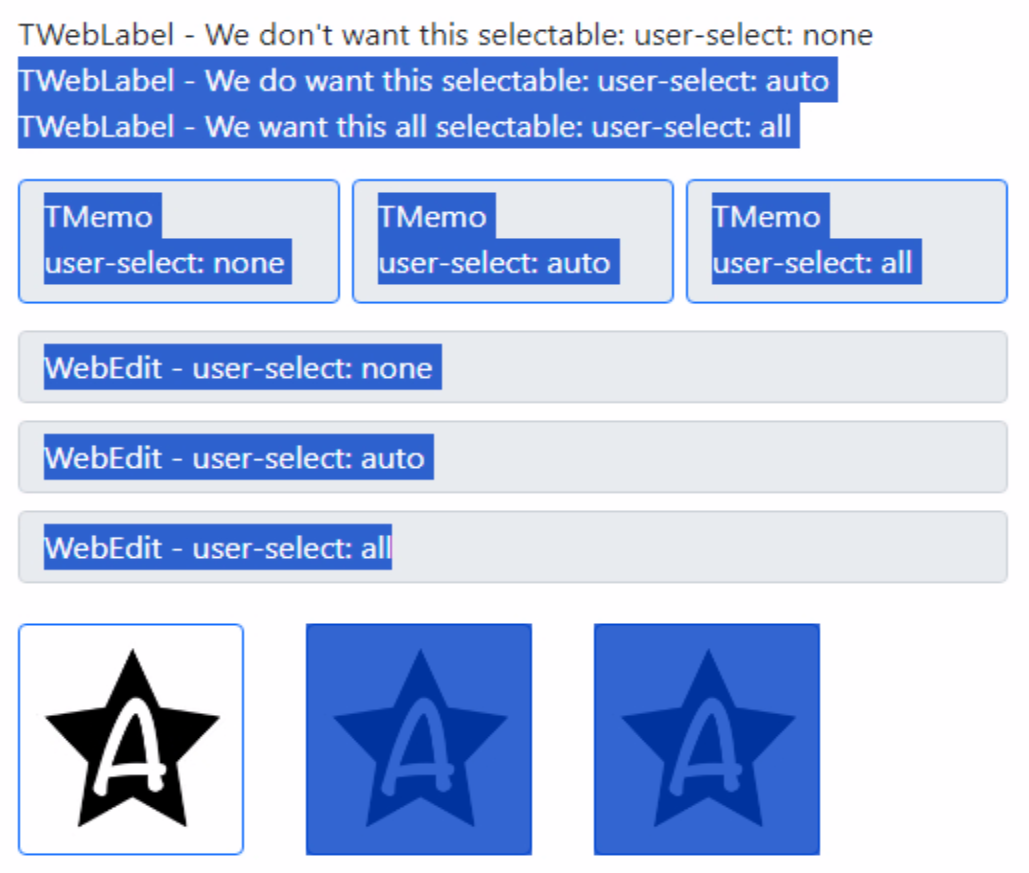
Select All: Chrome.
The ability to select these elements is the same between Chrome and Firefox, but their behavior is slightly
different, and slightly different again when compared to Safari. For example, in Firefox, the contents of the
TWebEdit and TWebMemo components can all be selected, but when typing Ctrl+A, we end up with a different
selected set.
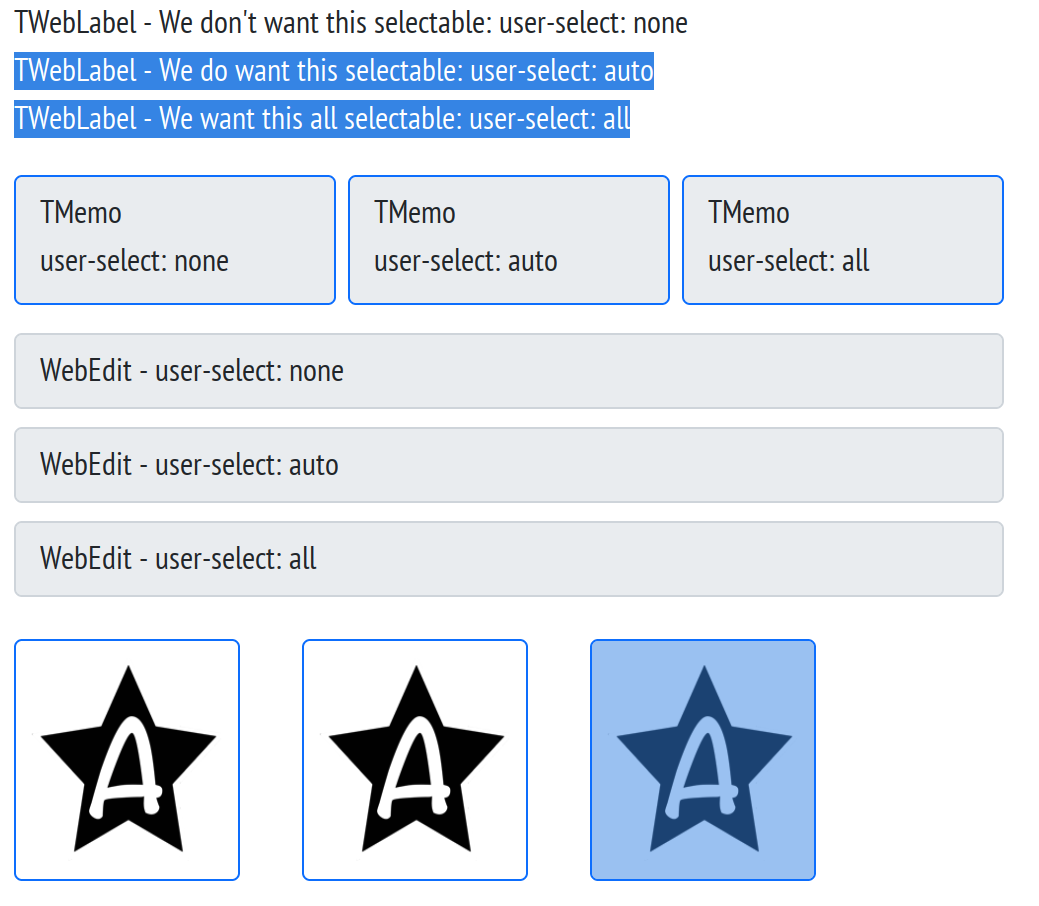
Select All: Firefox.
That's not very fun, but as we'll see, there are a few more areas where browsers are literally not all on the
same page. For most purposes, though, this isn't likely to be much of a problem. The general idea is that we'd
normally assign "user-select: none;" to the whole page, perhaps by adding "user-select-none" to the ElementClassName
property of the form. All of the TWebEdit and TWebMemo components would then still be selectable, which is
normally what we want.
We can then add either "user-select-all" or "user-select-auto" to any other components
that we want to be selectable, like a TWebLabel or a TWebHTMLDiv. This might come up if we're displaying a
message that we want the user to be able to copy, for example, without confusing them by highlighting the
structural parts of the UI.
Just For Fun.
Before moving on, there's another little tidbit worth sharing. In the above example, the TWebMemo and TWebEdit
components were marked as read-only as we'd routinely expect the selection mechanism to be available in editable
components. TWebLabels are naturally read-only as they are rendered in HTML as a <label> element and are not meant for editing. But
browsers have a little trick up their sleeves. Running the following command in the browser development console will allow
editing of some of those elements.
document.designMode = "on"
Even more fun, you can turn on this mode on any web page you visit, and then edit as you like. For example, a
quick visit to https://www.apple.com and, after enabling this switch, we can just type into the various text labels. Changing the normal "Learn more" label to "Learn more about Andrew" might be fun! Practically speaking, this
can be a handy way of making edits (to your own projects) if you need to make a mockup for a screenshot, or
things of that nature.

DesignMode applied to https://www.apple.com.
And as fun as that is, the point being made here is that once a browser has loaded a page, what it does or
doesn't allow may be out of our control. We have some input into the process, using things like CSS properties
to "suggest" that the browser should behave a certain way, but we're just crossing our fingers at that point.
A similar situation arises when trying to protect
content. Once a browser has displayed an image, for example, there are numerous ways for the user to make a
local copy of that image despite any efforts we might make to ensure that is not directly selectable on the page. And as we'll see a little later,
browsers go to some lengths to try and keep things as secure as possible regardless of what our intentions as
developers might be. We are definitely playing in their sandbox.
Paste.
Before we get to Copy, let's first talk about Paste. Backward, I realize. Generally speaking, the clipboard that a browser uses is the same clipboard used by the operating system hosting the browser - the "system clipboard". This allows us to copy and paste content between different browser pages or between different applications. Nothing surprising there.
However, we don't really want browser-based apps to be able to look at the contents of the system clipboard without explicit permission. For example, if you were copying an account number for a bill payment to the electric company over to a banking website to enter a payment, this account number would essentially be on the system clipboard. We don't want the browser to have access to that, or anything else on the system clipboard, without actually physically pasting content into a field in the browser window.
Why? Well, some web apps (looking at you, Facebook, but plenty of others might be offenders here) like to collect as much information about you as possible. And sometimes there's something in the system clipboard that we might not want to share with the world. These apps would, without such limitations, happily harvest that information. We can see this with native mobile apps all the time. Each time Android or iOS introduces a new security restriction of some kind, shining a light into a dark corner, all kinds of vermin scurry quickly out of sight as they hastily update their apps to hide their nefarious activities.
For example, it was not that long ago, that they introduced security restrictions on custom mobile keyboard-style apps. Suddenly we could see all these hugely popular but nefarious apps that were capturing all the keystrokes entered into these keyboards. Not good!
For our purposes today, we'll assume that the only data being pasted into our app anywhere is triggered
explicitly by the user using a browser-approved paste function. There is a TWebClipboard component included with
TMS WEB Core that can be used to intercept these paste events and provide the opportunity to process the
incoming text or image. Much of the time, though, we're not so concerned about that, as the user will most often
be pasting content into a TWebEdit or TWebMemo field and we don't need to do anything special to handle that.
Copy.
There are browser-level restrictions on Copy as well, as we'll see a bit later. But we have a bit more interest
in this capability, beyond just enabling or disabling what can be copied. Perhaps we want to add a copy button
beside an account number in our app, like in the electric company example previously mentioned. Or perhaps we're
publishing content that we anticipate users will want to copy from time to time for whatever reason, whether it
is blocks of text, links, images, or something else.
To implement a text copy operation, we can make use of the same TWebClipboard component mentioned above. In our sample project, let's add an editable TWebMemo component for entering sample text, and then an editable TRichEdit component where we can paste text and images. We can then set up a button to make it easy to copy the text from the TWebMemo component into the clipboard, which we can then manually paste into the TWebRichedit component.
Note that we don't need to drop a TWebClipboard component anywhere, but if we don't we'll need
to add WEBLib.Clipboard to our 'uses' clause. Here we're referencing a TWebClipboard component that was dropped on the form.
procedure TForm1.WebButton1Click(Sender: TObject);
begin
  WebClipboard1.CopyToClipboard(WebMemo4.Lines.Text);
  WebButton1.Caption := 'Copied!';
  asm
    setTimeout(() => { this.WebButton1.SetCaption('Copy Text');}, 3000);
  end;
end;
A few things to note here. First, the TWebClipboard clipboard internally uses the Clipboard API which itself requires a secure context. This code will work fine when running in development but may require an HTTPS/SSL connection when running elsewhere. We can check this at app startup and take appropriate action. Note that running locally counts as a secure context.
procedure TForm1.WebFormShow(Sender: TObject);
var
  secure: Boolean;
begin
  asm
    if (window.isSecureContext) {
      secure = true;
    } else {
      secure = false;
    }
  end;

  if secure then
  begin
    WebButton1.Enabled := True;
    WebButton2.Enabled := True;
  end
  else
  begin
    WebButton1.Enabled := False;
    WebButton2.Enabled := False;
    console.log('Not secure context: copy buttons disabled');
 end;
end;
Second, along these same lines, we're triggering this copy function in the implementation of our button click event. This is something that is explicitly permitted. If we tried to do this at some other time, in a non-user-triggered event, it might work, or it might get blocked. Or, as we'll see a little later, if we take too long to perform this operation, even in this event, it might still get blocked. Sort of a situation where doing something simple and straightforward is, well, simple and straightforward. But step even slightly out of bounds and things might be very different. This is something to test in whatever environment your project is likely to find itself in.
Third, we've got a little asm... ...end block added in to help put back our original button text after a short 3-second delay. The "setTimeout" JavaScript function is just a timer that triggers one event after the specified delay. This is different than "setInterval" (used by the TWebTimer component) which fires repeatedly after each interval. The interesting thing here is that we're using a JavaScript "arrow function". This calling convention doesn't remap "this." to itself but rather leaves it pointing at whatever it was pointing at before. This means that we can reference our button component using "this.WebButton".
If we instead used the normal setTimeout(function() {},3000); calling convention, "this." would not be available for this purpose. We would instead have to use something like "pas.Unit1.Form1.WebButton" or first instantiate another variable to point at "pas.Unit1.Form1" in order to reference our component and update its caption.
Here's what this looks like in action.
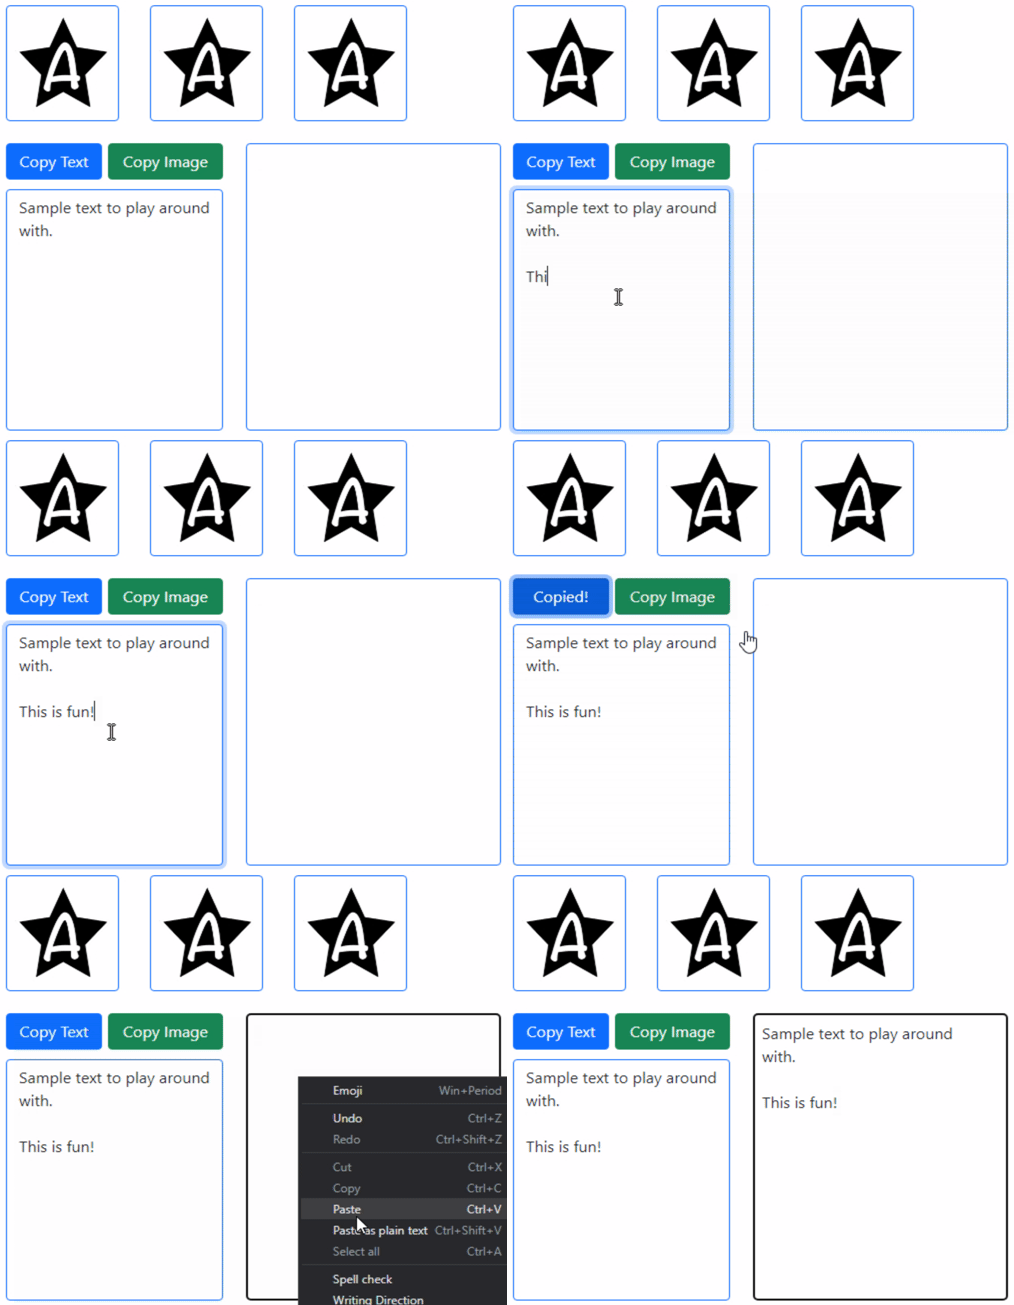
Copying Text.
The extra bit of effort to indicate that the copy operation has taken place can be helpful, but there are other
ways to show this. Perhaps using a "toast", updating another element on the page, or adding a temporary color change could
impart the same information. Always lots of options.
Images.
Copying and pasting text works pretty well, but what about images? The TWebClipboard component doesn't appear to directly support copying images in the same way, so we'll have to do it ourselves. Browser support for the Clipboard API is a bit uneven, but let's see what we can do here. We've got some images on the page already. These are just small PNG files loaded directly into the "picture" property of TWebImageControl components.
In order to use the Clipboard API, we'll need to provide the image as a JavaScript blob. JavaScript types, and in
particular mapping back and forth between Delphi types and JavaScript types isn't always all that intuitive, but
that doesn't mean it can't be done. Fortunately, we've got plenty of excellent examples to draw from in the TMS Support Center. Like this one. And an extra tip - if you load an image directly into a TWebImageControl,
be sure to call ResizeImage with the actual dimensions so you get back the image sized appropriately. Here's what we've got.
procedure TForm1.WebButton2Click(Sender: TObject);
var
  CopyImgAB: TJSArrayBuffer;
begin
  WebImageControl1.ResizeImage(WebImageControl1.Width, WebImageControl1.Height);
  CopyImgAB := WEBLib.Utils.Base64ToArrayBuffer(WebImageControl1.Base64Image);
  asm
    var blob = new Blob([new Uint8Array(CopyImgAB)], { type: 'image/png' });
    await navigator.clipboard.write([
      new ClipboardItem({
        [blob.type]: blob
      })
    ])
    this.WebButton2.SetCaption('Copied');
    setTimeout(() => { this.WebButton2.SetCaption('Copy Image');}, 3000);
  end;
end;
And with that, we've got our image copied into the clipboard. Note that the JavaScript Clipboard API is
asynchronous, so we use the "await" keyword. This means that we also have to add the [async] attribute to our
WebButton2Click declaration at the top of our unit. Here it is in use.
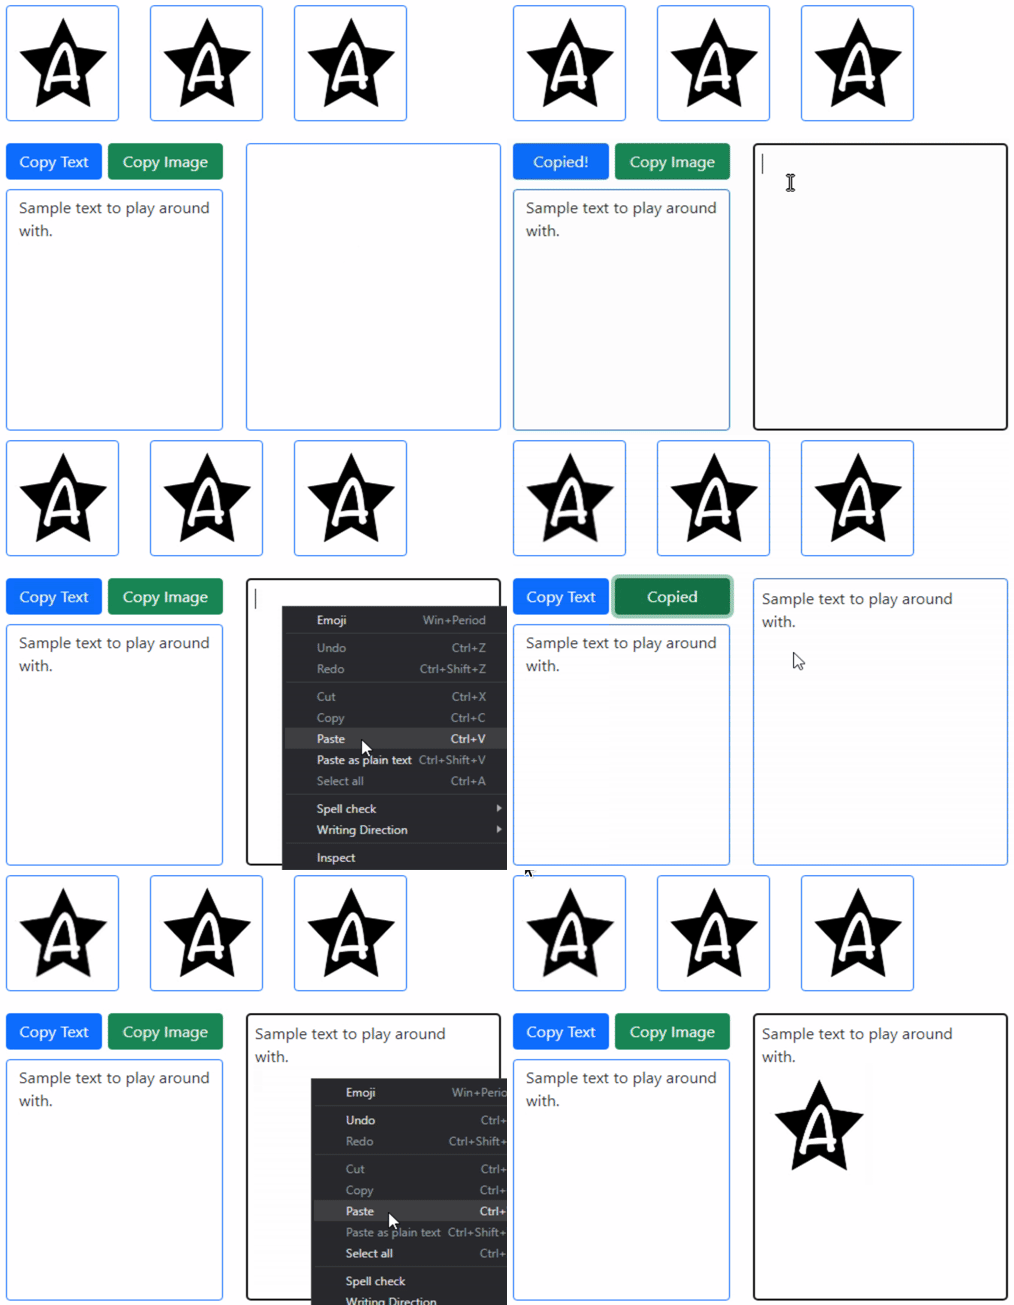
Copying an Image.
As previously, there may be issues with different browsers, so be sure to test thoroughly. Firefox in particular seems to be the most problematic in this respect. There are some aspects of the Clipboard API there which are not enabled by default, but which can be enabled with an option. And some people have deliberately disabled some aspects of the Clipboard API due to (not entirely unwarranted) fears about websites pilfering their clipboard data. Check out this post for a bit more background.
In particular, there is a Firefox configuration option - "dom.events.asyncClipboard.clipboardItem" - which can be enabled from Firefox's about:config page. If you're planning on using these kinds of clipboard operations in your projects, and your users are using Firefox, this is definitely something to consider encouraging them to enable.
Screenshots.
Which brings us to our final item. Let's say that we want the user to be able to make a copy of some part (or all) of our page and then copy that image to the clipboard. Perhaps there's a chart, a pay stub, or some other aspect of the page that we would like to provide in this fashion. There may even be a desire to offer the ability to download the screenshot or do something else with it. But here we're just interested in getting it into the clipboard.
We covered a bit about this topic in a post a while back about the Modern Screenshot JavaScript library, and we're going to use that again here. This library essentially re-renders a particular element on the page, or the entire page if you select 'body' as the element, into one of a number of image formats. We looked at the PNG variation last time, but here we already know we want a JavaScript blob, so we can use that variation directly.
We can also pass parameters that set the
size of the image that is generated, and even the scale. Our page is not all that dynamic at the moment, so we
can select a specific size, but this could be calculated or generated directly from the element if desired. Here's the
code we're working with.
procedure TForm1.WebButton3Click(Sender: TObject);
begin
  asm
    var blob = await modernScreenshot.domToBlob(document.querySelector('body'), {width:800, height:1000, scale:0.25, type:"image/png"});
    await navigator.clipboard.write([
      new ClipboardItem({
        [blob.type]: blob
      })
    ]);
    this.WebButton3.SetCaption('Copied!!');
    setTimeout(() => { this.WebButton3.SetCaption('Copy Element');}, 3000);
  end;
end;
The Modern Screenshot library takes care of the bulk of the work for us, and we're just back to passing the
generated blob to the same Clipboard API call that we used previously. All done, right? Right? Well, no.
After a bit of testing, it turns out that this doesn't always work everywhere. In Safari for example (not sure if it is just iOS or all of them), it takes a bit of time to generate that image. Enough time, it turns out, that our button click event is no longer permitted to write the resulting image to the clipboard.
This is a bit unexpected as everything seems to otherwise be in order. To address this, we have to rearrange
how these different methods are called. In effect, we're trying to make an adjustment so that our call to the
Clipboard API happens sooner in our button-click event. After the call itself has been validated, we then do the work to generate the
image. Confused? No doubt. Here's another version of the above.
procedure TForm1.WebButton3Click(Sender: TObject);
begin
  asm
    var getElementScreenshot = async () => {
      return await new modernScreenshot.domToBlob(document.querySelector('body'), {width:800, height:1000, scale:0.25, type:"image/png"});
    }
    await navigator.clipboard.write(
      [new ClipboardItem({["image/png"]: getElementScreenshot() })]
    )
    this.WebButton3.SetCaption('Copied!');
    setTimeout(() => { this.WebButton3.SetCaption('Copy Element');}, 3000);
  end;
end;
In this version, we define the method getElementScreenShot() that goes and gets the image, but we're just
defining the function initially. In the call to clipboard.write, we then pass along this function as a
parameter, and everyone is happy again. Well, potentially everyone is happy. Because we don't know what browsers
are going to be used in advance, whether or not Firefox has been configured the way we like, or whether
other Clipboard API support has been enabled or disabled, we can throw both of these versions at the wall and maybe
cover a few use cases we don't even know about. Here's the final version.
procedure TForm1.WebButton3Click(Sender: TObject);
begin
  asm
    try {
      var getElementScreenshot = async () => {
        return await new modernScreenshot.domToBlob(document.querySelector('body'), {width:800, height:1000, scale:0.25, type:"image/png"});
      }
      await navigator.clipboard.write(
        [new ClipboardItem({["image/png"]: getElementScreenshot() })]
      )
      this.WebButton3.SetCaption('Copied!');
      setTimeout(() => { this.WebButton3.SetCaption('Copy Element');}, 3000);
    }
    catch {
      var blob = await modernScreenshot.domToBlob(document.querySelector('body'), {width:800, height:1000, scale:0.25, type:"image/png"});
      await navigator.clipboard.write([
        new ClipboardItem({
          [blob.type]: blob
        })
      ]);
    this.WebButton3.SetCaption('Copied!!');
    setTimeout(() => { this.WebButton3.SetCaption('Copy Element');}, 3000);
    }
  end;
end;
The idea is that if neither of them work, clicking the copy button won't actually change the text to say
"Copied". If it does work, you'll see either "Copied!" or "Copied!!" depending on which one made it through. And
with a little luck, we've got most of the major browsers covered. Here's what it looks like.
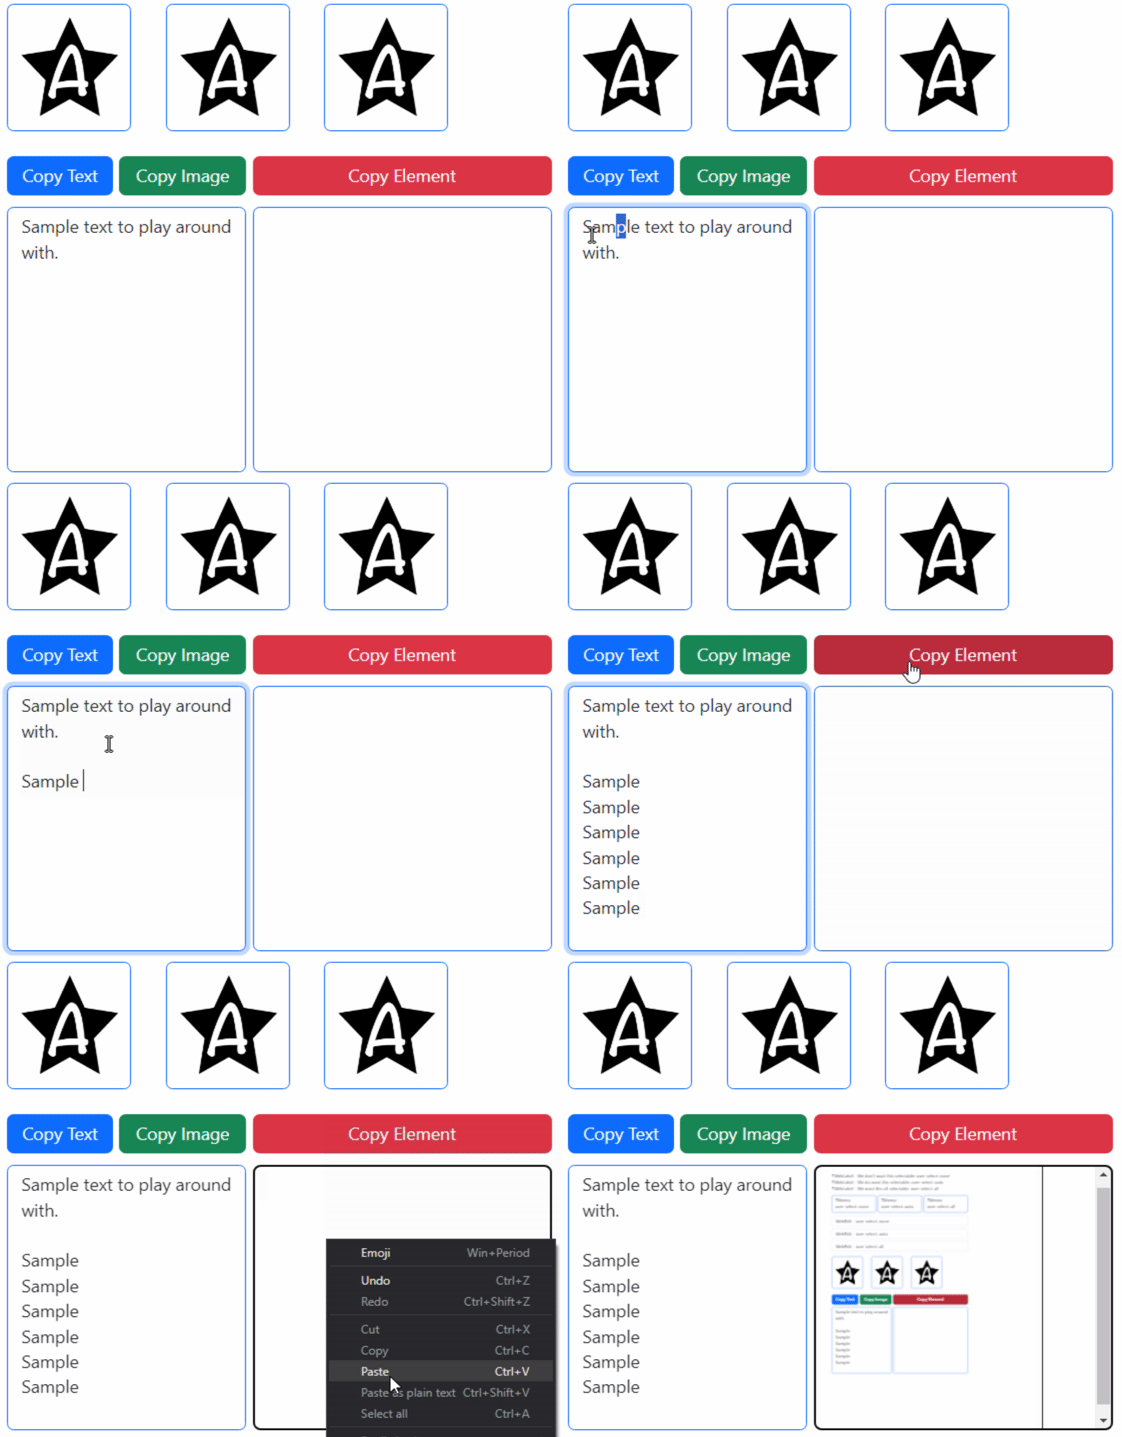
Copying a Screenshot.
The entire page can then be pasted, scaled down to 25% of its original size. Of course, we wouldn't be doing
this just to copy an image of the page into itself, but rather to be able to copy any element of the page to the
clipboard, suitable for pasting anywhere else. We don't really have to think about whether the element is an image or some complex HTML and CSS - the resulting image we get will just be whatever was rendered on the page previously, being mindful of the limitations of using Modern Screenshot that we covered previously.
We could use largely this same approach to add other buttons to
download, print, e-mail, or even send the captured image as a text message, all of which have far fewer security-related issues to deal
with when it comes to playing in the browser sandbox.
Useful?
That's it for this post. Does this sound like something destined for your projects? Is there something
that has been overlooked that you'd like to know more about? As always, comments and feedback are very much
appreciated. And if you've not gotten a chance to check out the action on 𝕏, that's another
potential resource for having exactly these kinds of conversations. Check out those links below.
Follow Andrew on 𝕏 at @WebCoreAndMore or join our 𝕏 Web Core and More Community.
Andrew Simard

This blog post has received 4 comments.

 2. Sunday, February 18, 2024 at 9:43:48 AM
I cannot think of anything specific to a PWA that would prevent this from working properly. There are the usual caveats, like ensuring that all the libraries you need are being loaded and that in some cases you need to be sure you are using an HTTPS connection, particularly if NOT running locally, but other than that I think things should work as expected?
Andrew Simard
 3. Monday, February 19, 2024 at 3:46:22 PM
Update, this was my error, when I changed the buttons to match the sample project, the [Async] got deleted. I failed to check to ensure the [Async] was in place correctly. When the [Async] was placed, the error message was eliminated. Thanks for your help Andrew!
Green Lawrence N

 4. Monday, February 19, 2024 at 8:05:53 PM
Always good to hear when a puzzle gets solved! Happy to help.
Andrew Simard
All Blog Posts | Next Post | Previous Post
I tried to work it into a existing PWA application a got a whole bunch of funny errors.
We I started a blank project, and copied & pasted the code in, it all worked fine...
Is there any reason that the Web3button of only the screen copy would not work on a PWA application?
Thanks!
Green Lawrence N