Blog
All Blog Posts | Next Post | Previous Post

 Your familiar HotSpot Image comes to the TMS FNC UI Pack v3.3
Thursday, March 25, 2021
We have a new major release of the TMS FNC UI Pack, next to some fixes and new features, we have added the TTTMSFNCHotSpotImage to the already extensive set of powerful and feature-rich UI controls that can be used cross framework and cross platform with just one code base.
TMS FNC Controls can be simultaneously used on these frameworks:
TMS FNC Controls can be simultaneously used on these operating systems/browsers:
TMS FNC Controls can be simultaneously used on these IDE's:
TTMSFNCHotSpotImage
This component is already known to VCL and FMX users and for the TMS WEB Core users who don't know the component, you can compare it with the idea of an Image Map.
The TTMSFNCHotSpotImage (further referred to as 'hotspotimage') gives you the ability to choose one image and then add different areas (hotspots) with which you can interact and each of them can have their own appearance.
TTMSFNCHotSpotImageEditor
Our team considers the convenience of visually creating and configuring your components, that is why an editor was created to help you design your hotspots. This can be done in designtime by a double click or right-click on the hotspotimage. To give you full control over your hotspotimage, the editor is also available in runtime.

Hotspotimage Demo
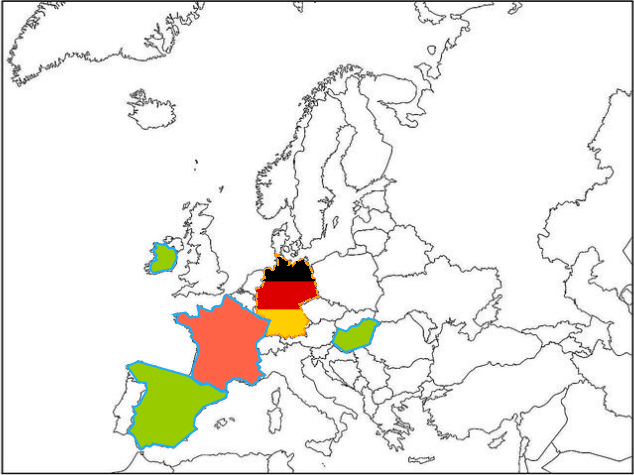
To let you get more familiar with the component, we have created a demo application that you can find here.This topic describes the steps we have taken to create such a demo application. It is a simple example of a selection game that shows a lot of features. You'll need to find the correct country for a given capital.
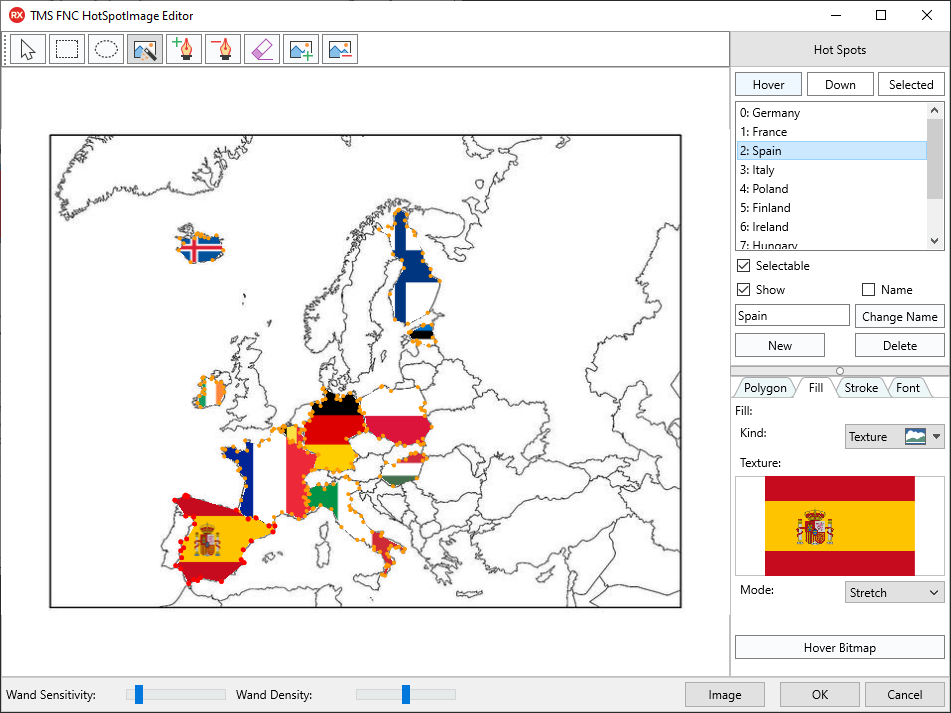
The TTMSFNCHotSpotImageEditor (further referred to as 'hotspotimage editor') can be used to create the hotspots of the different countries. All of the following can be done in the code as well. But to give an example of the possibilities, we will explain how to this visually.
The image can be added in the editor or with the Bitmap property.
On the top of the editor there is a toolbar that can be used to create or manipulate the poylgons. Because there is a high contrast and the edgy shape of the different countries, the Magic Wand was the perfect tool to create the polygons. In the panel on the right, you have the buttons 'Hover', 'Selected' and 'Down'. With these buttons you can change the appearance for the different states. If none of the hotspots are selected in the listbox, then you are able to change the default appearance used on newly created hotspots in the different pages. On the other hand, if you select a hotspot, you can change the appearance for the specific hotspot. This way, I've changed the Fill kind of the polygon to a texture with an image of the flag. You can also change the stroke and font used by the hotspot.
To change the name of the different hotspots, select the hotspot in the listbox, edit the text in the edit box and click on the 'Change Name' button.
Now let's have a look at the code that is used. Besides the code used to change the settings between game mode and normal selection mode, only two specific events are needed.
The event OnSelectedHotSpotChange where the check is added to see if the selection is allowed.
As it would not be helpful to unselect a hotspot while playing the game.
procedure TForm2.TMSFNCHotSpotImage1SelectedHotSpotChange(Sender: TObject; AIndex: Integer; var Allow: Boolean);
begin
  if (AIndex >= 0) and not TMSFNCHotSpotImage1.HotSpots[AIndex].Selected then
    Allow := True
  else
    Allow := False;
end;
If it is allowed, then we can catch the change of the index with the event OnSelectedHotSpotChanged.
In this event we check if the name of the selected hotspot is the same as the one we were looking for.
if that is the case we add a point to our score and pick a new random country. If not, then the selected index is set back to false and if the answer was wrong for the second time, then we retrieve the hotspot by its name and and fill that one with a red color.
procedure TForm2.TMSFNCHotSpotImage1SelectedHotSpotChanged(Sender: TObject; AIndex: Integer);
var
  hsIdx: Integer;
begin
  if (length(countries) > 0) and Start then
  begin
    if TMSFNCHotSpotImage1.HotSpots[AIndex].Name = countries[idx] then
    begin
      Label2.Text := cities[idx] + ' is the capital of ' + countries[idx] + ' ('+ Point.ToString+')';
      Score := Score + Point;
      Label3.Text := Score.ToString + '/10';

      Delete(cities, idx, 1);
      Delete(countries, idx, 1);
      NextCapital;
    end
    else
    begin
      TMSFNCHotSpotImage1.HotSpots[AIndex].Selected := False;
      Point := Point - 0.5;

      if Point = 0 then
      begin
        hsIdx := TMSFNCHotSpotImage1.GetHotSpotIndexByName(countries[idx]);
        if hsIdx > -1 then
        begin
          TMSFNCHotSpotImage1.HotSpots[hsIdx].Appearance.SelectedFill.Color := gcTomato;
          TMSFNCHotSpotImage1.HotSpots[hsIdx].Selected := True;
        end;

        Label2.Text := cities[idx] + ' is not the capital of ' + TMSFNCHotSpotImage1.HotSpots[AIndex].Name + ' but ' + countries[idx] + ' (Next question)';

        Delete(cities, idx, 1);
        Delete(countries, idx, 1);

        NextCapital;
      end
      else
        Label2.Text := cities[idx] + ' is not the capital of ' + TMSFNCHotSpotImage1.HotSpots[AIndex].Name + ' ('+Point.ToString+')';
    end;
  end;
end;
The rest of the code can be found in the demo folder of the TMS FNC UI Pack.
This video of Gjalt's 101 gives you a quick example on how the 'Hover Bitmap' property is used:
Gjalt Vanhouwaert

This blog post has received 2 comments.

 2. Friday, March 26, 2021 at 8:42:28 AM
Thank you for your appreciation!
Gjalt Vanhouwaert
All Blog Posts | Next Post | Previous Post


Ramazan Geven