Frequently Asked Component Specific Questions
Options |
|
Display all FAQ items |
Displaying items 166 to 180 of 888, page 12 of 60
<< previous next >>

 TMS IntraWeb iPhone controls pack
Avoid access to non-visual IWEdit controls
When using 2 IWRegion controls that each contain an IWEdit control in combination with a TIWIPhonePageTransition control. If the user presses the "< " ">" keys to move to the next or previous field, they can reach a field on a region that is not being displayed. The display will even show portions of both regions simultaneously.
Solution:
You can set the Enabled property of the IWEdit controls on the non-visual IWRegion controls to false. Then set it to true again when TransitionToNext or TransitionToPrevious is called.
Example:
procedure TIWForm8.TIWIPhoneHeader1AsyncRightButtonClick(Sender: TObject;
  EventParams: TStringList);
begin
  IWEdit1.Enabled := false;
  IWEdit2.Enabled := true;
  TIWIPhonePageTransition1.TransitionToNext;
end;

procedure TIWForm8.TIWIPhoneHeader2AsyncLeftButtonClick(Sender: TObject;
  EventParams: TStringList);
begin
  IWEdit1.Enabled := true;
  IWEdit2.Enabled := False;
  TIWIPhonePageTransition1.TransitionToPrevious;
end;
TMS FMX UI PackTTMSFMXGrid: How to get access to a ProgressBar object inside a cell
You can access each cell and its properties in the OnGetCellProperties event:
procedure TForm1.TMSFMXGrid1GetCellProperties(Sender: TObject; ACol,
  ARow: Integer; Cell: TFmxObject);
var
  p: TTMSFMXProgressBar;
begin
  if Cell is TTMSFMXProgressGridCell then
  begin
    p := (Cell as TTMSFMXProgressGridCell).ProgressBar;
    p.ShowText := False;
  end;
end;
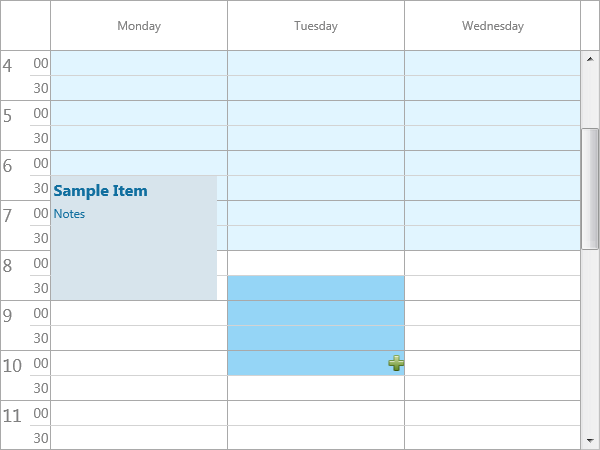
TMS FMX UI PackTTMSFMXPlanner: How to show a bitmap at selection of a timeslot
You can add a bitmap at selection with the following code:
procedure TForm1.FormCreate(Sender: TObject);
begin
  TMSFMXPlanner1.SelectionAppearance.Fill.Kind := TBrushKind.None;
end;

procedure TForm1.TMSFMXPlanner1AfterDrawCell(Sender: TObject;
  ACanvas: TCanvas; ARect: TRectF; ACol, ARow: Integer; AStartTime,
  AEndTime: TDateTime; APosition: Integer; AKind: TTMSFMXPlannerCacheItemKind);
var
  bmp: TBitmap;
begin
  if (ARow = TMSFMXPlanner1.Selection.EndCell.Row) and (ACol = TMSFMXPlanner1.Selection.EndCell.Col) then
  begin
    bmp := TBitmap.Create;
    bmp.LoadFromFile(''MyImage'');
    try
      ACanvas.DrawBitmap(bmp, RectF(0, 0, bmp.Width, bmp.Height), RectF(ARect.Right - bmp.Width, ARect.Top + (ARect.Height - bmp.Height) / 2,
        ARect.Right, ARect.Top + (ARect.Height - bmp.Height) / 2  + bmp.Height), 1);
    finally
      bmp.Free;
    end;
  end;
end;

procedure TForm1.TMSFMXPlanner1BeforeDrawCell(Sender: TObject;
  ACanvas: TCanvas; ARect: TRectF; ACol, ARow: Integer; AStartTime,
  AEndTime: TDateTime; APosition: Integer; AKind: TTMSFMXPlannerCacheItemKind;
  var AAllow, ADefaultDraw: Boolean);
begin
  if (ARow >= TMSFMXPlanner1.Selection.StartCell.Row) and (ARow <= TMSFMXPlanner1.Selection.EndCell.Row)
    and (ACol >= TMSFMXPlanner1.Selection.StartCell.Col) and (Acol <= TMSFMXPlanner1.Selection.EndCell.Col) then
  begin
    ACanvas.Fill.Assign(TMSFMXPlanner1.SelectionAppearance.Fill);
    ACanvas.Fill.Kind := TBrushKind.Solid;
  end;
end;
 TMS FMX UI Pack
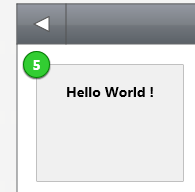
TTMSFMXTileList: How to change the default color of the badge
You can change the default color with the following code:
procedure TForm1.TMSFMXTileList1CustomizeTileBadge(Sender: TObject;
  ATile: TTMSFMXTile; ATileBadge: TControl);
var
  r: TControl;
begin
  (ATile.ShapeBadge as TTMSFMXBadge).NeedStyleLookup;
  (ATile.ShapeBadge as TTMSFMXBadge).ApplyStyleLookup;
  r := (ATile.ShapeBadge as TTMSFMXBadge).GetContent;

  if Assigned(r) then
  begin
    (r as TRoundRect).Fill.Color := claLimegreen;
    (r as TRoundRect).Fill.Kind := TBrushKind.Solid;
    (r as TRoundRect).Stroke.Color := claGreen;
  end;
end;
 TAdvPanel
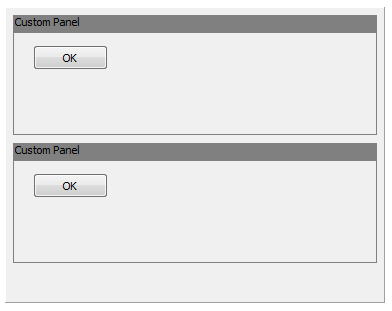
Using a custom TAdvPanel class to insert panels in a TAdvPanelGroup
By default, calling AdvPanelGroup.AddPanel will create and insert an instance of TCustomAdvPanel in the AdvPanelGroup. You can override this by setting the class to create via AdvPanelGroup1.PanelClass. Note that the class to be created must descend from TCustomAdvPanel.
Example:
This is a custom created TAdvPanel class that automatically adds a button the panel:
type
  TMyCustomPanel = class(TAdvPanel)
  private
    FButton: TButton;
  public
    constructor Create(AOwner: TComponent); override;
    destructor Destroy; override;
    property Button: TButton read FButton;
  end;


{ TMyCustomPanel }

constructor TMyCustomPanel.Create(AOwner: TComponent);
begin
  inherited Create(AOwner);

  FButton := TButton.Create(Self);
  FButton.Parent := Self;
  FButton.Top := 30;
  FButton.Left := 20;
  FButton.Caption := ''OK'';
end;

destructor TMyCustomPanel.Destroy;
begin
  FButton.Free;
  inherited;
end;
begin
  AdvPanelGroup1.PanelClass := TMyCustomPanel;
  AdvPanelGroup1.AddPanel;
end;
 TAdvOfficePager
Indicate progress of a process on the tab of a TAdvOfficePager
This option saves space and indicates useful progress information to users when different processes are handled in different tabs. To enable progress on the tab, this can be configured via TAdvOfficePage.Progress:
procedure TForm1.FormCreate(Sender: TObject);
begin
  AdvOfficePager11.Caption := ''Tab with progress'';
  AdvOfficePager11.Progress.Visible := true;
  AdvOfficePager11.Progress.Position := 25;
  // set this to true to make tab also visible when it is not selected:
  AdvOfficePager1.ShowNonSelectedTabs := true;
end;
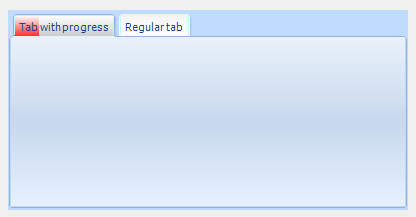
The progress class has further properties to customize the progressbar colors / background colors.
TMS FlexCel for VCL & FMXHow to create an Excel file with a gradient in a cell, a protected sheet and an autofilter
Excel files can be very complex, and guessing how to for example add a gradient to a cell, or protect a sheet, or add an autofilter can get difficult.
To make it easier, FlexCel provides a very useful tool named APIMate that can "convert" an Excel file into FlexCel code, for either Delphi or C++ Builder.
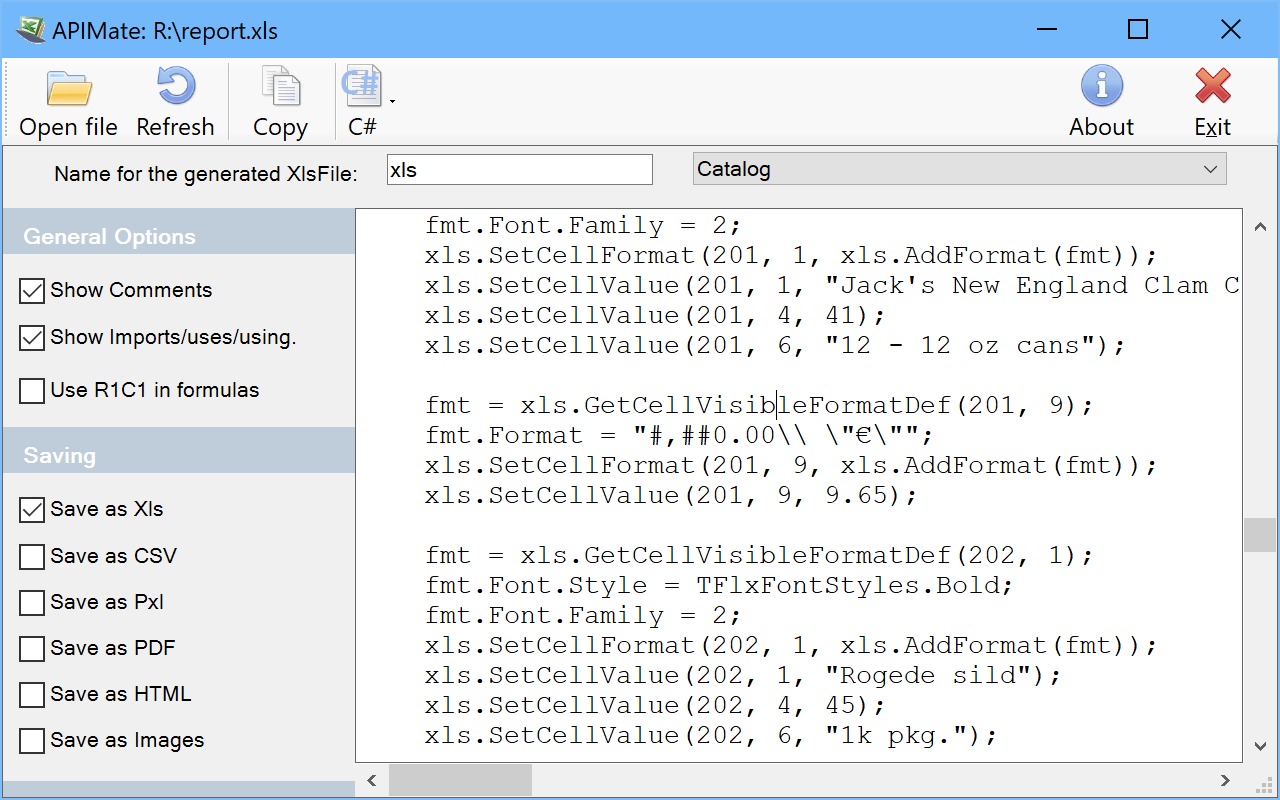
It works like this: You create a file in Excel, and open it in APIMate (without closing Excel). It will tell you the Delphi or C++ code needed to create the file. Then you can make changes in Excel, save the file, and press “Refresh” in APIMate (all without closing Excel). It will tell you the code you need to modify the file from the old state to the new one.
We are now in position to answer the question at the top of this section: How to create a file with a gradient in a cell, a protected sheet and an autofilter? I created a simple file with those things in Excel, and APIMate gives back this code:
procedure CreateFile(const xls: TExcelFile);
var
  fmt: TFlxFormat;
  GradientStops: TArray<TGradientStop>;
  SheetProtectionOptions: TSheetProtectionOptions;

begin
  xls.NewFile(1, TExcelFileFormat.v2010);  //Create a new Excel file with 3 sheets.

  //Set the names of the sheets

xls.ActiveSheet := 1;
  xls.ActiveSheet := 1;  //Set the sheet we are working in.

  //Global Workbook Options
  xls.OptionsCheckCompatibility := false;

  //Printer Settings
  xls.PrintXResolution := 600;
  xls.PrintYResolution := 600;
  xls.PrintOptions := [TPrintOptions.Orientation];

  fmt := xls.GetCellVisibleFormatDef(3, 1);
  fmt.FillPattern.Pattern := TFlxPatternStyle.Gradient;
  SetLength(GradientStops, 2);
  GradientStops[0].Position := 0;
  GradientStops[0].Color := TExcelColor.FromTheme(TThemeColor.Background1);
  GradientStops[1].Position := 1;
  GradientStops[1].Color := TExcelColor.FromTheme(TThemeColor.Accent1);
  fmt.FillPattern.Gradient := TExcelLinearGradient_Create(GradientStops, 90);
  xls.SetCellFormat(3, 1, xls.AddFormat(fmt));

  //AutoFilter
  xls.SetAutoFilter(1, 3, 5);

  //Protection
  SheetProtectionOptions := TSheetProtectionOptions.Create(false);
    SheetProtectionOptions.Contents := true;
    SheetProtectionOptions.Objects := true;
    SheetProtectionOptions.Scenarios := true;
    SheetProtectionOptions.SelectLockedCells := true;
    SheetProtectionOptions.SelectUnlockedCells := true;
  xls.Protection.SetSheetProtection(''******'', SheetProtectionOptions);
end;
APIMate is not the panacea for all the questions, but it helps a lot answering many of those "how do I?" doubts. Remember to use it.
TMS VCL WebGMapsProviding credentials to the Google Maps API
There are 2 different methods of providing credentials to the Google Maps API when working with TMS WebGMaps:
1. Regular Google Maps access API Key
https://console.developers.google.com
This key identifies your project to check quotas and access.
At the Google Developers Console, go to "API Manager", "Credentials" to view your existing API Key(s) or create a new one.
You can assign this key to the APIKey property.
2. Google Maps for Work access Client ID and Signature
https://www.google.com/intx/en_uk/work/mapsearth/
https://developers.google.com/maps/premium/overview
These credentials identify your Google Maps for Work project.
After sign up for Google Maps for Work you should receive the required information.
You can assign these to the APIClientID and APISignature properties.
TDBAdvGridHow to show a hint when hovering over the column header
You can use the OnGridHint event and via the var parameter hintstr specify the hint for each cell.
TMS FMX WebGMapsHow to center & display all the markers on the map
You can use the Markers.Bounds call to retrieve the bounds coordinates of all markers, these bounds can then be used as a parameter in the MapZoomTo call.
Example:
TMSFMXWebGMaps1.MapZoomTo(TMSFMXWebGMaps1.Markers.Bounds);
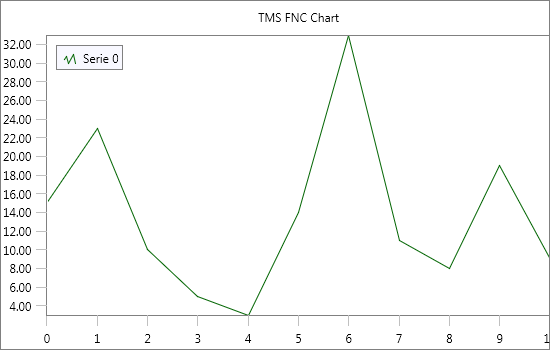
TMS FNC ChartAdd array of singles with one function
const
  val: array[1..12] of Single = (15,23,10,5,3,14,33,11,8,19,9,22);
begin
  TMSFNCChart1.BeginUpdate;
  TMSFNCChart1.Clear;
  TMSFNCChart1.AddPointArray(val);
  TMSFNCChart1.EndUpdate;
end;
 TAdvSmoothPanel
How to export/save an image, displayed in a TAdvSmoothPanel, in its rounded form
The picture is saved as the original picture. Here you can download a sample that demonstrates how you can save the picture as a rounded image .
 TMS VCL WebGMaps
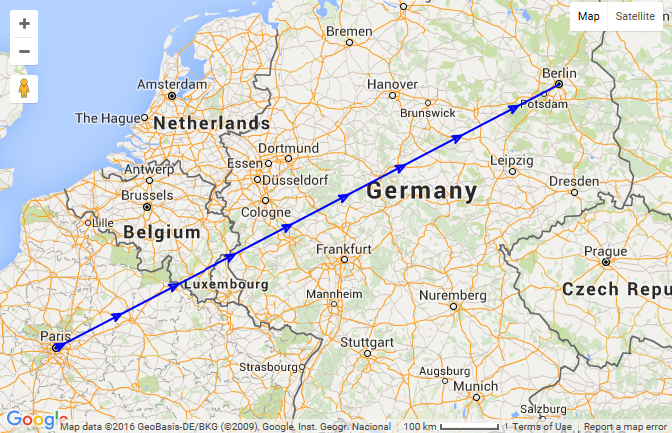
How to add a Polyline with symbols to the map
This is a sample of how to add a Polyline with symbols to the map:
var
 Symbols: TSymbols;
  Symbol: TSymbol;
  Path: TPath;
begin
  Path := TPath.Create;
  Path.Add(48.85, 2.35);
  Path.Add(52.51, 13.38);

  Symbols := TSymbols.Create;
  Symbol := Symbols.Add;
  Symbol.SymbolType := stForwardClosedArrow;
  Symbol.OffsetType := dtPixels;
  Symbol.Offset := 10;
  Symbol.RepeatValue := 64;
  Symbol.RepeatType := dtPixels;

  WebGMaps1.Polylines.Add(false, false, false, Symbols, Path, clBlue, 255, 2, true, 1);
end;
 TAdvGroupBox
Cloning a TAdvGroupBox at runtime
Cloning a TAdvGroupBox (or any other control) at runtime can be done with following code:
var
  grp: TAdvGroupBox;
begin
  RegisterClass(TAdvGroupBox);
  clipboard.SetComponent(advgroupbox1);
  grp := clipboard.GetComponent(self, self) as TAdvGroupBox;
  // force position of new clone to 0,0 position
  grp.Left := 0;
  grp.Top := 0;
end;
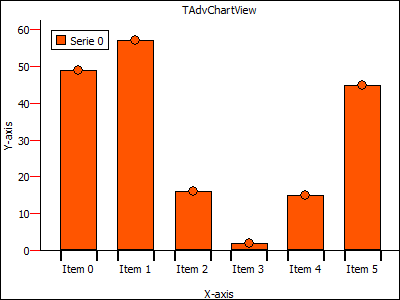
TMS VCL ChartCustom X-Axis drawing
procedure TForm1.FormCreate(Sender: TObject);
var
  I: Integer;
begin
  AdvChartView1.BeginUpdate;
  AdvChartView1.Panes[0].Series[2].Free;
  AdvChartView1.Panes[0].Series[1].Free;
  AdvChartView1.Panes[0].Series[0].OnXAxisDrawValue := XAxisDrawVal;
  AdvChartView1.Panes[0].Series[0].ChartType := ctBar;
  AdvChartView1.Panes[0].Series[0].XAxis.AutoUnits := False;
  AdvChartView1.Panes[0].XAxis.AutoSize := False;
  AdvChartView1.Panes[0].Series[0].AutoRange := arEnabledZeroBased;
  AdvChartView1.Panes[0].XAxis.Size := 50;
  for I := 0 to 9 do
    AdvChartView1.Panes[0].Series[0].AddSinglePoint(Random(100), ''Item '' + inttostr(I));
  AdvChartView1.EndUpdate;
end;

procedure TForm1.XAxisDrawVal(Sender: TObject; Serie: TChartSerie;
  Canvas: TCanvas; ARect: TRect; ValueIndex, XMarker: integer; Top: Boolean;
  var defaultdraw: Boolean);
var
  bw, tw: Integer;
  s: string;
begin
  defaultdraw := False;
  bw := Serie.GetBarWidth(1) div 2;
  Canvas.Pen.Color := clBlack;
  Canvas.Pen.Width := 2;
  Canvas.MoveTo(XMarker - bw + 1 , ARect.Top);
  Canvas.LineTo(XMarker - bw + 1, ARect.Top + 10);
  Canvas.MoveTo(XMarker + bw + 1, ARect.Top);
  Canvas.LineTo(XMarker + bw + 1, ARect.Top + 10);
  s := Serie.Points[ValueIndex].LegendValue;
  tw := Canvas.TextWidth(s);
  Canvas.TextOut(XMarker - tw div 2, ARect.Top + 12, s);
end;