Blog
All Blog Posts | Next Post | Previous Post

 Add custom controls to your map with TMS FNC Maps for Delphi
Thursday, February 10, 2022
ElementContainers is a major new feature in TMS FNC Maps v3.0. With ElementContainers you can add custom controls on top of the map. These custom controls consist of HTML and CSS elements. Interaction with the map and the application can be added by using Actions. At runtime the content of the ElementContainers can be updated dynamically through JavaScript. ElementContainers are independent of the mapping service which means they will look and function identically regardless of your preferred mapping service. A preview is automatically available at design-time to make editing the HTML/CSS elements as straightforward as possible.
In this blog post I'll demonstrate how easy it is to add a custom interactive zoom control to the map.
The Basics
- Drop a TTMSFNCMaps on the form and select your preferred mapping service.
We’ll use msOpenLayers here so we don’t need an API key.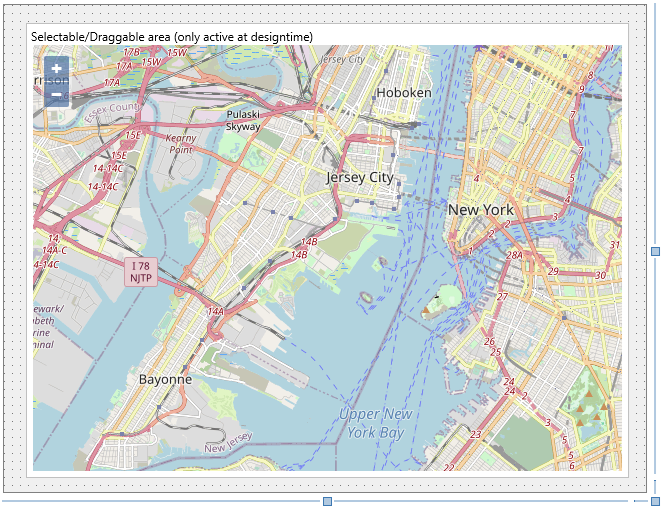
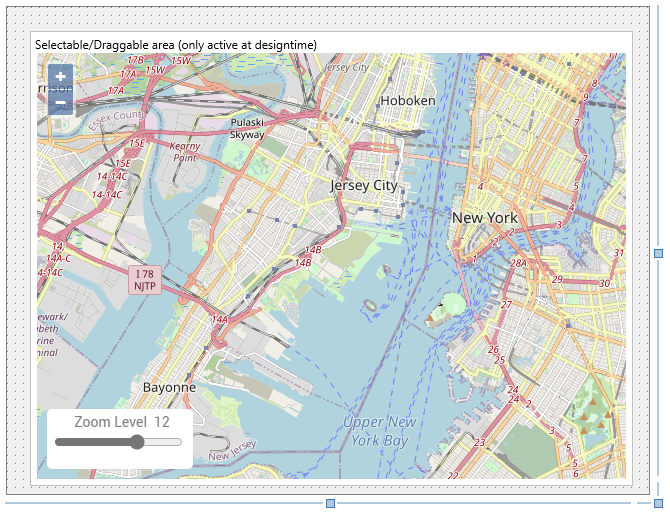
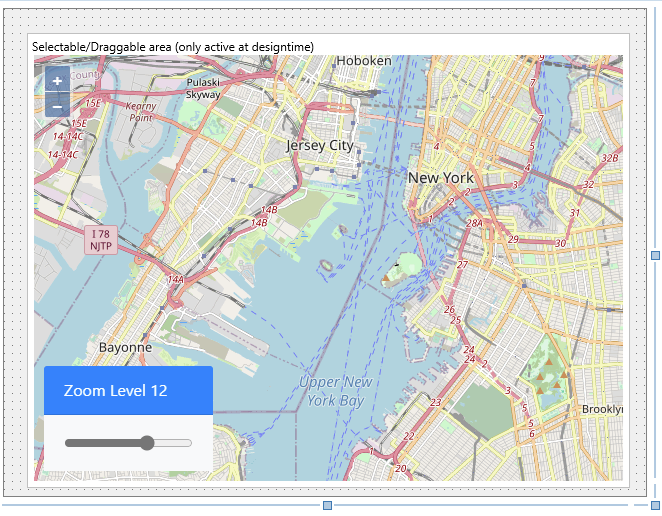
- Add an item to the ElementContainers collection. An empty ElementContainer is displayed.
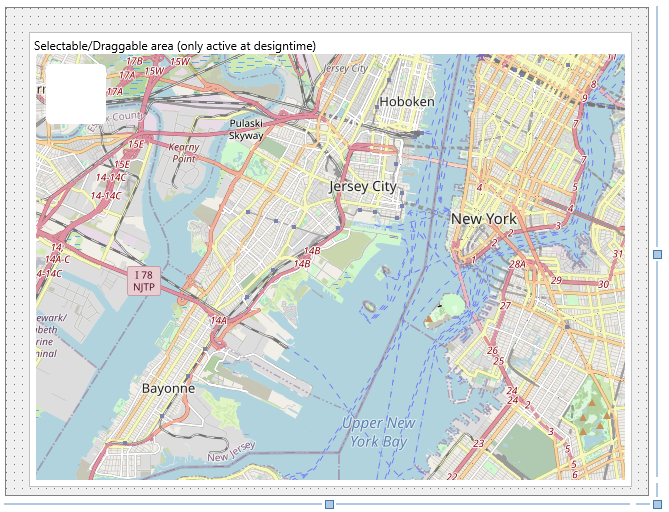
- Add content to the HTML property.
We’ll add a title, a label and a slider element to the ElementContainer.
<div>
Zoom Level
<span id="customZoom1">12</span>
</div>
<div>
<input type="range" min="0" value="12" max="18" id="customRange1">
</div>
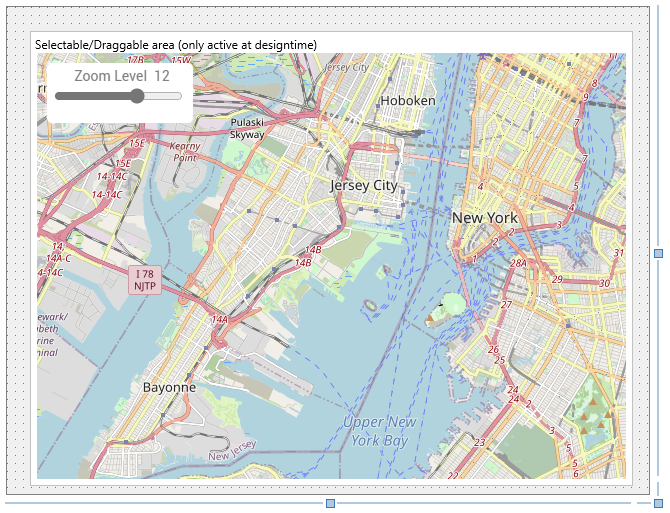
- Position the container anywhere on the map with the Position and Margin properties. We’ll place the container in the bottom left corner of the map: set Position to poBottomLeft.
- Add an item to the Actions collection of the ElementContainer to interact with the map.
Select the ID from the element to interact with from the HTMLElementID dropdown list. In this case pick “customRange1” to interact with the slider control. Set Event to heCustom and CustomEvent to input to catch the input event of the slider control. Set EventReturnValue to rvValue to retrieve the updated value of the slider control.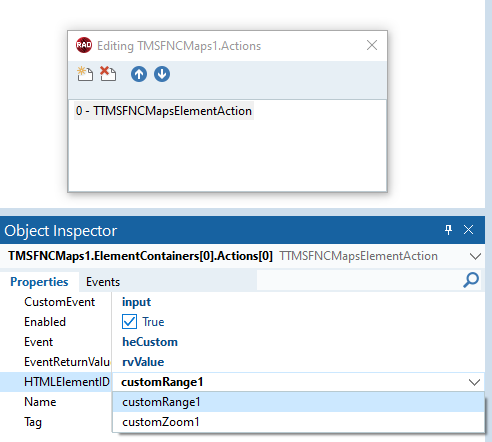
- Assign the ElementAction’s OnExecute event to add an event handler.
The updated slider control value is returned as a string in the AEventData.CustomData property. We can use this value to update the map’s zoom level with the code below: - Assign the TTMSFNCMaps’s OnZoomChanged event to interact with the ElementContainer.When the map’s zoom level changes, get the new zoom level and update the label and slider control in the ElementContainer.
procedure TForm1.TMSFNCMaps1ZoomChanged(Sender: TObject; AEventData: TTMSFNCMapsEventData); begin TMSFNCMaps1.GetZoomLevel; end; procedure TForm1.TMSFNCMaps1GetZoomLevel(Sender: TObject; AZoomLevel: Double); begin TMSFNCMaps1.ExecuteJavaScript('document.getElementById("customRange1").value = ' + FloatToStrDot(AZoomLevel)); TMSFNCMaps1.ExecuteJavaScript('document.getElementById("customZoom1").innerText = ' + FloatToStrDot(Round(AZoomLevel))); end;The custom control is now ready to be used.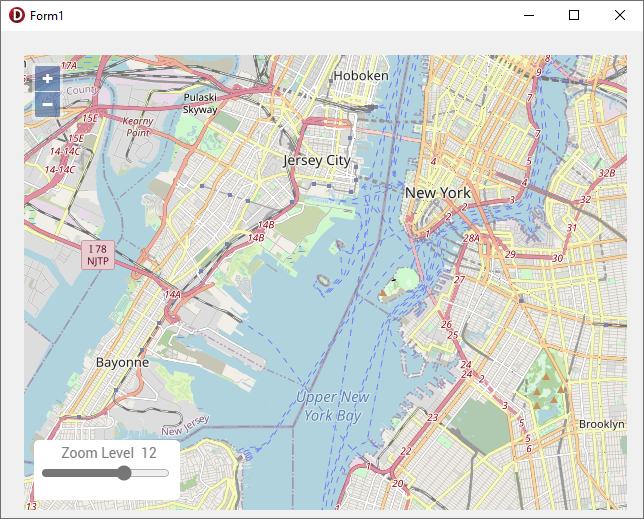
procedure TForm1.TMSFNCMaps1ElementContainers0Actions0Execute(Sender: TObject;
  AEventData: TTMSFNCMapsEventData);
var
  f: Double;
  v: string;
begin
  f := 0;
  v := StringReplace(AEventData.CustomData, '"', '', [rfReplaceAll]);
  if TryStrToFloatDot(v, f) then
   TMSFNCMaps1.SetZoomLevel(f);
end;
The Styling
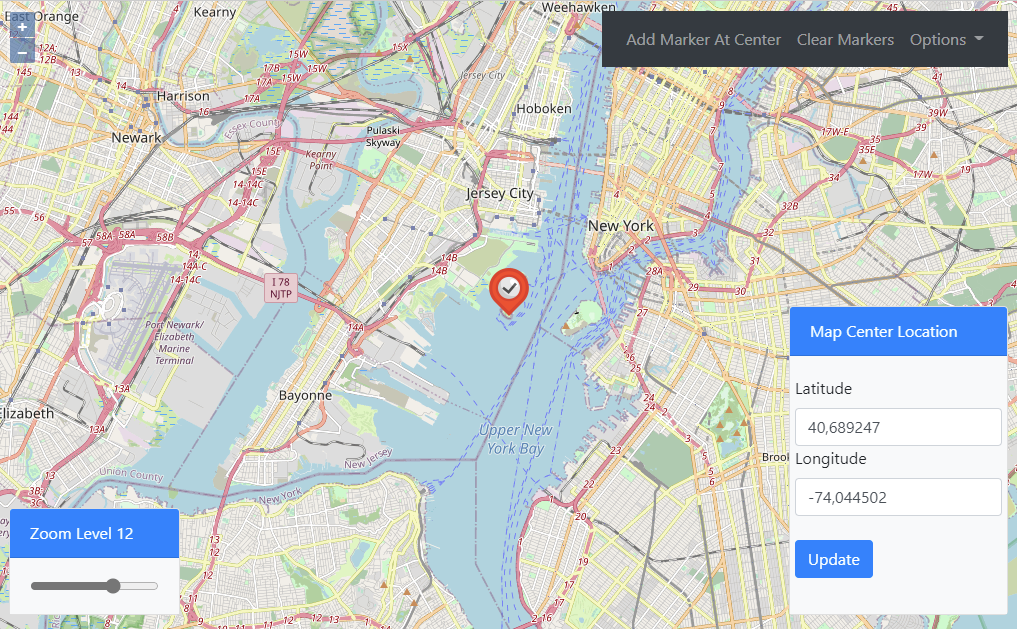
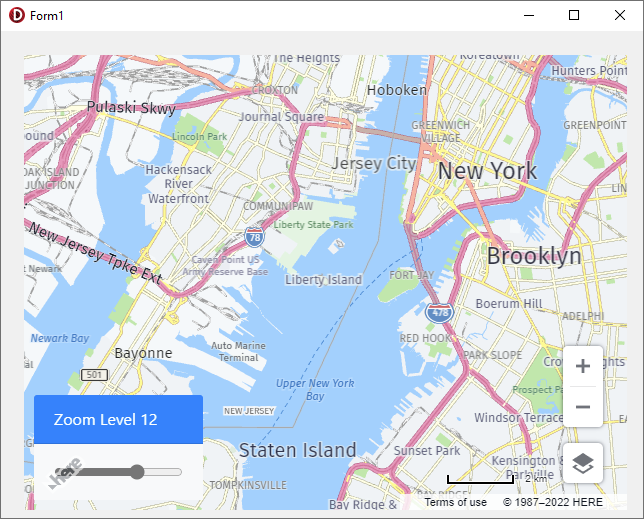
Using Bootstrap is a straightforward way to improve the visuals of HTML elements. With a few adjustments Bootstrap styling can be added to ElementContainers.
- Include the Bootstrap CSS library via the HeadLinks collection.
Add an item to the HeadLinks collection; set Kind to mlkLink, URL to “https://maxcdn.bootstrapcdn.com/bootstrap/4.0.0/css/bootstrap.min.css” and Rel to “stylesheet”.
- Add Bootstrap HTML classes to the ElementContainer’s HTML.Change the HTML value to:
<div for="customRange1" class="card-header bg-primary text-white">
Zoom Level
<span class="card-label" id="customZoom1">12</span>
</div>
<div class="card-body bg-light">
<input type="range" class="form-range" min="0" value="12" max="18" id="customRange1">
</div>
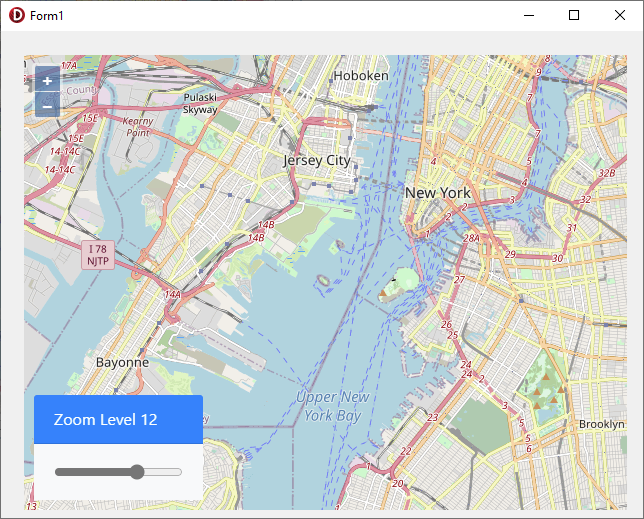
Because ElementContainers are completely independent from the mapping service, the result looks exactly the same even when switching to a different service. The screenshot below shows the same ElementContainer with Service set to msHere.
The Code
procedure TForm1.FormCreate(Sender: TObject);
var
  ElementContainer: TTMSFNCMapsElementContainer;
  ElementAction: TTMSFNCMapsElementAction;
  html: TStringList;
begin
  TMSFNCMaps1.ClearElementContainers;
  TMSFNCMaps1.ClearHeadLinks;

  TMSFNCMaps1.BeginUpdate;

  TMSFNCMaps1.AddHeadLink('https://maxcdn.bootstrapcdn.com/bootstrap/4.0.0/css/bootstrap.min.css', mlkLink, 'stylesheet');

  html := TStringList.Create;
  html.Add('<div for="customRange1" class="card-header bg-primary text-white">'
    + 'Zoom Level '
    + '<span class="card-label" id="customZoom1">12</span>'
    +' </div>'
    +' <div class="card-body bg-light">'
    +' <input type="range" class="form-range" min="0" value="12" max="18" id="customRange1">'
    +'</div>');

  ElementContainer := TMSFNCMaps1.AddElementContainer(html);
  ElementContainer.HTMLElementClassName := 'card';
  ElementContainer.Position := poBottomRight;
  ElementContainer.Margins.Bottom := 15;
  ElementContainer.UseDefaultStyle := False;

  ElementAction := ElementContainer.AddAction('customRange1', heCustom);
  ElementAction.CustomEvent := 'input';
  ElementAction.EventReturnValue := rvValue;
  ElementAction.OnExecute := TMSFNCMaps1ElementContainers0Actions0Execute;

  html.Free;

  TMSFNCMaps1.EndUpdate;
end;
The Video
My colleague Dr. Holger Flick demonstrates how you can add interactive elements to the map.
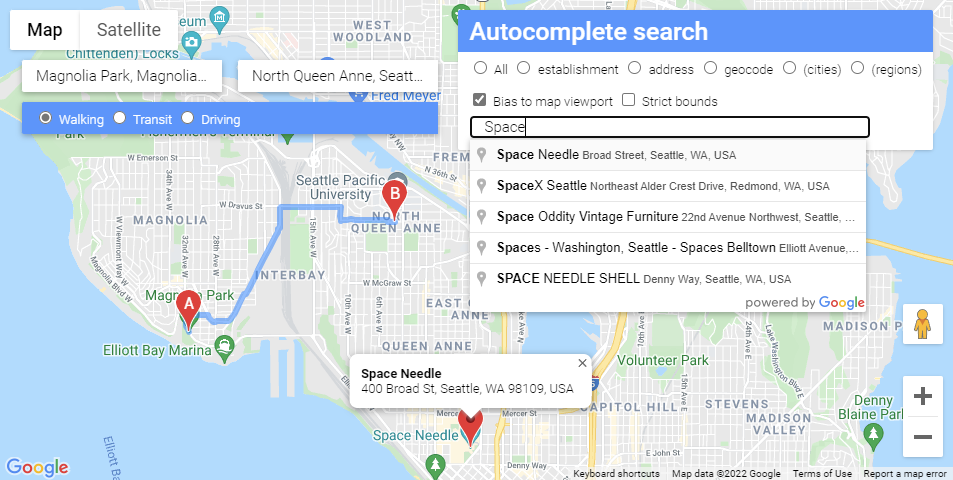
The Advanced Techniques
A more advanced sample is available in the trial and registered version of TMS FNC Maps as well. This demonstrates how the Google Maps integrated directions and autocomplete services can be combined in custom controls with ElementContainers.
The Possibilities Are Endless
With this major new feature in TMS FNC Maps v3.0 we open up endless possibilities to add fully customizable interactive elements to the map of your choice!
Bart Holvoet

This blog post has not received any comments yet.
All Blog Posts | Next Post | Previous Post