Blog
All Blog Posts | Next Post | Previous Post

 Taking the new Windows Vista TaskDialog one step further
Wednesday, January 21, 2009
Introduction
In article 5, we've introduced the basic API to use the new Vista TaskDialog from Delphi. The basic API however only allows to do marginally more than the good old MessageBox.To get more out of the new TaskDialog, Vista exposes the API TaskDialogIndirect that offers a lot more capabilities than the simplified TaskDialog version.
Using TaskDialogIndirect is a little bit more complex but we have encapsulated all this in an easy to use Delphi component TTaskDialog with properties and events that expose the new functionality. The source code of the new TTaskDialog is available and those interested can study it. Source file and package have been built with and tested for Delphi 2006. This article will focus on explaining how the new features can be used with the component from Delphi.
The samples below can be used by dropping the TTaskDialog on the form, setting its properties and calling Execute.
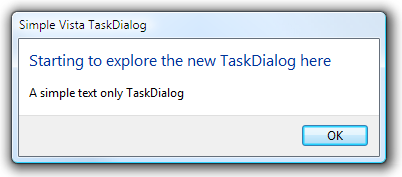
Starting with the simple dialog This code snippet shows a dialog with title text, main instruction and content:
TaskDialog1.Title := 'Simple Vista TaskDialog';
TaskDialog1.Instruction := 'Starting to explore the new TaskDialog here';
TaskDialog1.Content := 'A simple text only TaskDialog';
TaskDialog1.CommonButtons := [cbOK];
TaskDialog1.Execute;
Dialog with custom buttons
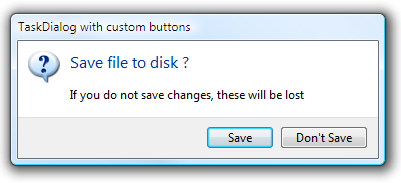
In the first example, a common OK button was choosen. With the property CustomButtons, it is possible to specify your own text for the button. Where for common buttons, TaskDialog.Execute returns the common Windows values for Ok, Cancel, Yes, No, ... the first custom button returns 100, the second 101, etc...
TaskDialog1.Title := 'TaskDialog
with custom buttons';
TaskDialog1.Icon := tiQuestion;
TaskDialog1.CustomButtons.Clear;
TaskDialog1.CustomButtons.Add('Save');
TaskDialog1.CustomButtons.Add('Don''t Save');
TaskDialog1.DefaultButton := 101;
TaskDialog1.Instruction := 'Save file to disk ?';
TaskDialog1.Content := 'If you do not save changes, these will be lost';
ShowMessage(inttostr(TaskDialog1.Execute));
Dialog with CommandButtons
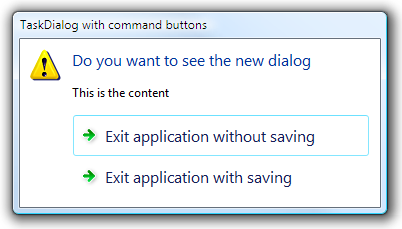
To make the possible actions standout, the buttons can be turned into CommandButtons like in the screenshot below. The code is very similar to the previous sample, just the setting doCommandLinks was added in TaskDialog.Options:
TaskDialog1.Title := 'TaskDialog with command buttons';
TaskDialog1.Icon := tiWarning;
TaskDialog1.CustomButtons.Clear;
TaskDialog1.CustomButtons.Add('Exit application without saving');
TaskDialog1.CustomButtons.Add('Exit application with saving');
TaskDialog1.DefaultButton := 100;
TaskDialog1.Options := [doCommandLinks];
TaskDialog1.Execute;
TaskDialog with expandable region, footer text and hyperlink
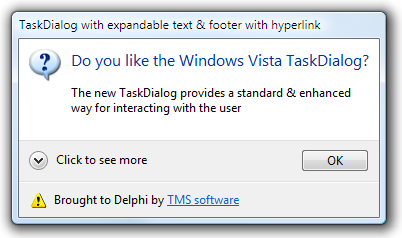
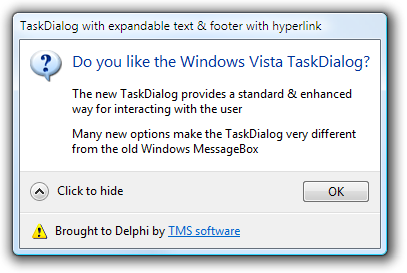
To make dialogs more clear & concise, it is possible to optionally hide detail text that expert users might want to see. The detail text is set with the ExpandedText property. As soon as this contains a non-empty text, it will be shown in the dialog after clicking on the arrow expand button. It is possible to override the default text for the expand/collaps button as well with the properties ExpandControlText, CollapsControlText. To activate the user of hyperlinks in TaskDialog text, it is required to set doHyperlinks = true in TaskDialog.Options. When the hyperlink is clicked, the event OnDialogHyperlinkClick is triggered.TaskDialog1.Options := [doHyperlinks]; TaskDialog1.Title := 'TaskDialog with expandable text & footer with hyperlink'; TaskDialog1.Instruction := 'Do you like the Windows Vista TaskDialog?'; TaskDialog1.Icon := tiQuestion; TaskDialog1.Content := 'The new TaskDialog provides a standard & enhanced way for interacting with the user'; TaskDialog1.ExpandedText := 'Many new options make the TaskDialog very different from the old Windows MessageBox'; TaskDialog1.ExpandControlText := 'Click to hide'; TaskDialog1.CollapsControlText := 'Click to see more'; TaskDialog1.Footer := 'Brought to Delphi by <A href="https://www.tmssoftware.com">TMS software</A>'; TaskDialog1.FooterIcon := tfiWarning; TaskDialog1.Execute;
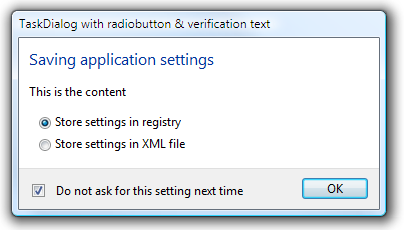
TaskDialog with RadioButtons and Verify checkbox
A TaskDialog can also contain a series of radiobuttons to allow the user to make a choice. In addition, the typical checkbox can be added that allows the user to decide whether this dialog should be displayed in the future or not. The choice of the radiobuttons is returned by TaskDialog.RadioResult. The result for the first radiobutton is 200, the 2nd radiobutton 201, etc... The selection of the verification checkbox is returned by TaskDialog.VerifyResult.
TaskDialog1.Title := 'TaskDialog
with radiobutton & verification text';
TaskDialog1.RadioButtons.Clear;
TaskDialog1.RadioButtons.Add('Store settings in registry');
TaskDialog1.RadioButtons.Add('Store settings in XML file');
TaskDialog1.VerificationText := 'Do not ask for this setting next time';
TaskDialog1.Instruction := 'Saving application settings';
TaskDialog1.Execute;
case TaskDialog1.RadioButtonResult of
200: ShowMessage('Store in registry');
201: ShowMessage('Store in XML');
end;

if TaskDialog1.VerifyResult then
  ShowMessage('Do not ask for this setting next time');
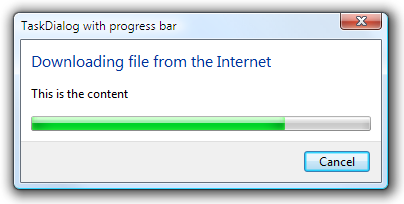
TaskDialog with ProgressBar
Finally, it is equally possible to use the new TaskDialog for progress indication. To enable a progressbar on the TaskDialog, set doProgressBar = true in TaskDialog.Options. From the event TaskDialog.OnDialogProgress, the position of the progressbar is queried. By default, the TaskDialog progress position is between 0 and 100 but can be set to other values with ProgressBarMin & ProgressBarMax properties. The sample code snippet shows how to setup the TaskDialog with progressbar and a simple event that updates the progress. In addition, by invoking the TaskDialog.ClickButton() when progress is 100%, the code makes the dialog automatically disappear when the process is complete.
progresspos := 0;

TaskDialog1.Title := 'TaskDialog with progress bar';
TaskDialog1.Instruction := 'Downloading file from the Internet';
TaskDialog1.Options := [doProgressBar];
TaskDialog1.CommonButtons := [cbCancel];
TaskDialog1.OnDialogProgress := DoDialogProgress;
TaskDialog1.Execute;

procedure
TForm1.DoDialogProgress(Sender: TObject; var Pos: Integer; var State:
TTaskDialogProgressState);
begin
  if (progresspos < 100) then
  begin
    (Sender as TTaskDialog).EnableButton(1,false);
    inc(progresspos,2);
  end
  else
  begin
    (Sender as TTaskDialog).EnableButton(1,true);
    (Sender as TTaskDialog).ClickButton(1);
  end;
  Pos := progresspos;
  State := psNormal;
end;
 Download the source code for TTaskDialog.
Bruno Fierens

This blog post has received 2 comments.

 2. Sunday, May 22, 2016 at 9:50:05 AM
AutoClose = true means the dialog will close itself after the number of milliseconds set in AutoCloseTimeOut.
2. Sunday, May 22, 2016 at 9:50:05 AM
AutoClose = true means the dialog will close itself after the number of milliseconds set in AutoCloseTimeOut.When doTimer = true in Options, the OnDialogTimer event will be triggered.
Bruno Fierens
All Blog Posts | Next Post | Previous Post
AutoClose
AutoCloseTimer
Options - doTimer
I understand how the first two work but have not idea what doTimer does.
Steve Gill