Blog
All Blog Posts | Next Post | Previous Post

 Create a Cross-Platform Shopping List App in Minutes with TMS FNC DataGrid and StellarDS
Wednesday, November 13, 2024
Setting up StellarDS.io

To get started with StellarDS, the first step is creating an account on stellards.io. Once you’ve signed up, you’ll gain access to the StellarDS control panel, where you can manage your applications and configure access settings.
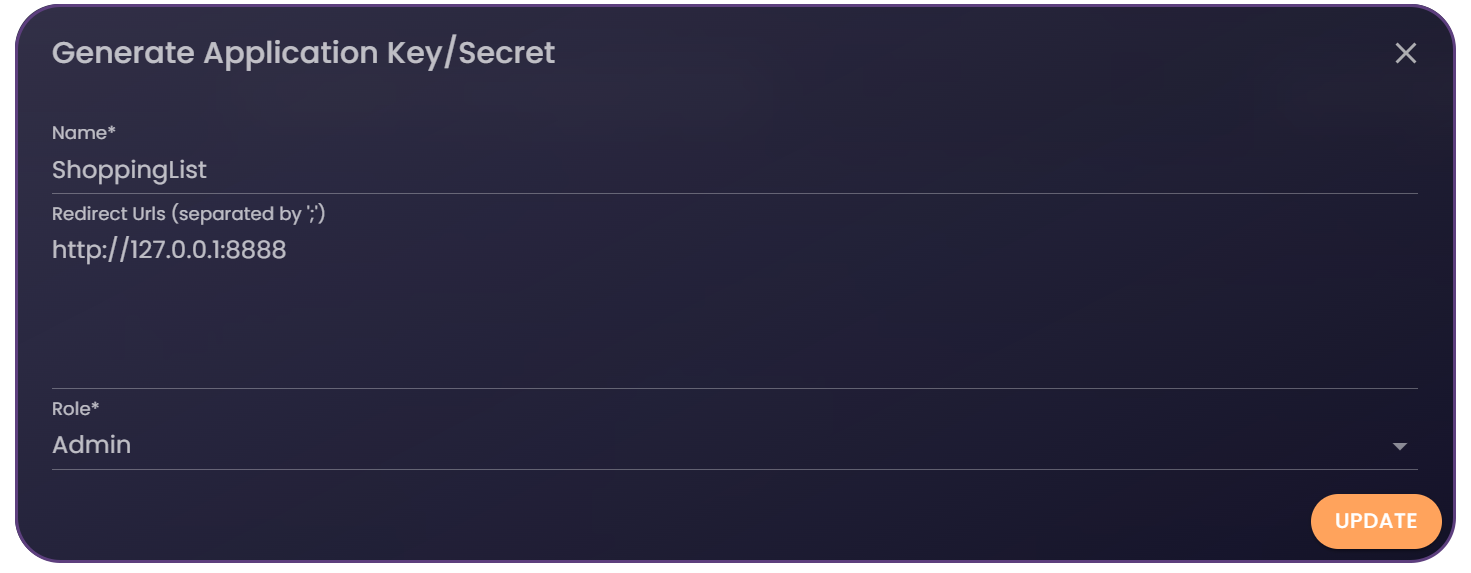
- Create an Application Key: Navigate to the Applications page in the control panel, and create a new application. This will generate an OAuth 2.0 key/secret, which you’ll use to securely connect your app.
- Assign Admin Role: Since we’ll be using this key to create, update, and manage table metadata, it’s important to assign it an admin role to allow full access.
- Set the Callback URL: Finally, set the callback URL to 127.0.0.1:8888. This URL is where StellarDS will redirect users after authentication, completing the setup.

Save the ClientID, callback URL and secret somewhere, as you'll need them later.
With these steps done, you’re ready to integrate StellarDS into your application!
Integrate StellarDS into your applications
To display our data, we’ll need a few key components: TTMSFNCDataGrid, TTMSFNCDataGridAdapter, TDataSource, and TMSFNCCloudStellarDataStoreDatasetFMX. These components will allow seamless data integration between your app and StellarDS. For more details on connecting the data grid with StellarDS, check out the official guide here.
To authenticate with StellarDS, double-click the TMSFNCCloudStellarDataStoreDatasetFMX component. This component works like a regular Dataset and enables you to data-bind StellarDS.io to UI Controls. It handles the connection and all calls to the StellarDS.io REST API so that you don't have to implement this.
This will open an authentication dialog where you’ll input the callback URL, ClientID, and secret from the earlier steps. After clicking "Authenticate," you’ll be prompted to log in. Once logged in, you should see all the tables and metadata for your project.
Next, select your project, and create a new table called Shopping List. Optionally, add a description, and click Add to create the table. With the table added, select it and define the following fields:
| Item | Nvarchar(255) |
| Quantity | Integer |
| DateAdded | DateTime |
| User | Nvarchar(255) |
| Priority | Integer |
| Finished | Boolean |
After adding these fields, click OK. A prompt will appear asking if you’d like to add the fields to the dataset—simply click Yes to complete the setup, and your fields will be ready for use.
Writing our code
Now that our components are set up, let’s add a button for adding new items to the shopping list.
  TMSFNCCloudStellarDataStoreDataSetFMX1.Append;
  TMSFNCCloudStellarDataStoreDataSetFMX1DateAdded.Value := Now;
  TMSFNCCloudStellarDataStoreDataSetFMX1User.Value := FUserName;
  TMSFNCCloudStellarDataStoreDataSetFMX1.Post;
  TMSFNCDataGrid1.FocusedCell := MakeCell(TMSFNCDatagrid1.FocusedCell.Column + 1, TMSFNCDatagrid1.FocusedCell.Row);
  TMSFNCDataGrid1.EditCell(TMSFNCDataGrid1.FocusedCell)
Android support
For Android compatibility, a few extra steps are required. Add FNCWebChromeClient.jar and JavaScriptHelper.jar to the target platform. Then, in the OnFormCreate event, include the following line to specify token persistence:
TMSFNCCloudStellarDataStoreDataSetFMX1.PersistTokens.Key := TPath.GetDocumentsPath + PathDelim + 'StellarDSGridDemo.ini';
This setup allows your application to function on Android, enabling users to share the shopping list across devices within the same project.
Expanding our application
To style the application, we’ve applied a theme using TTMSFNCStyleManager. Simply select a style, and it will apply to the entire form, enhancing the app's visual appeal.

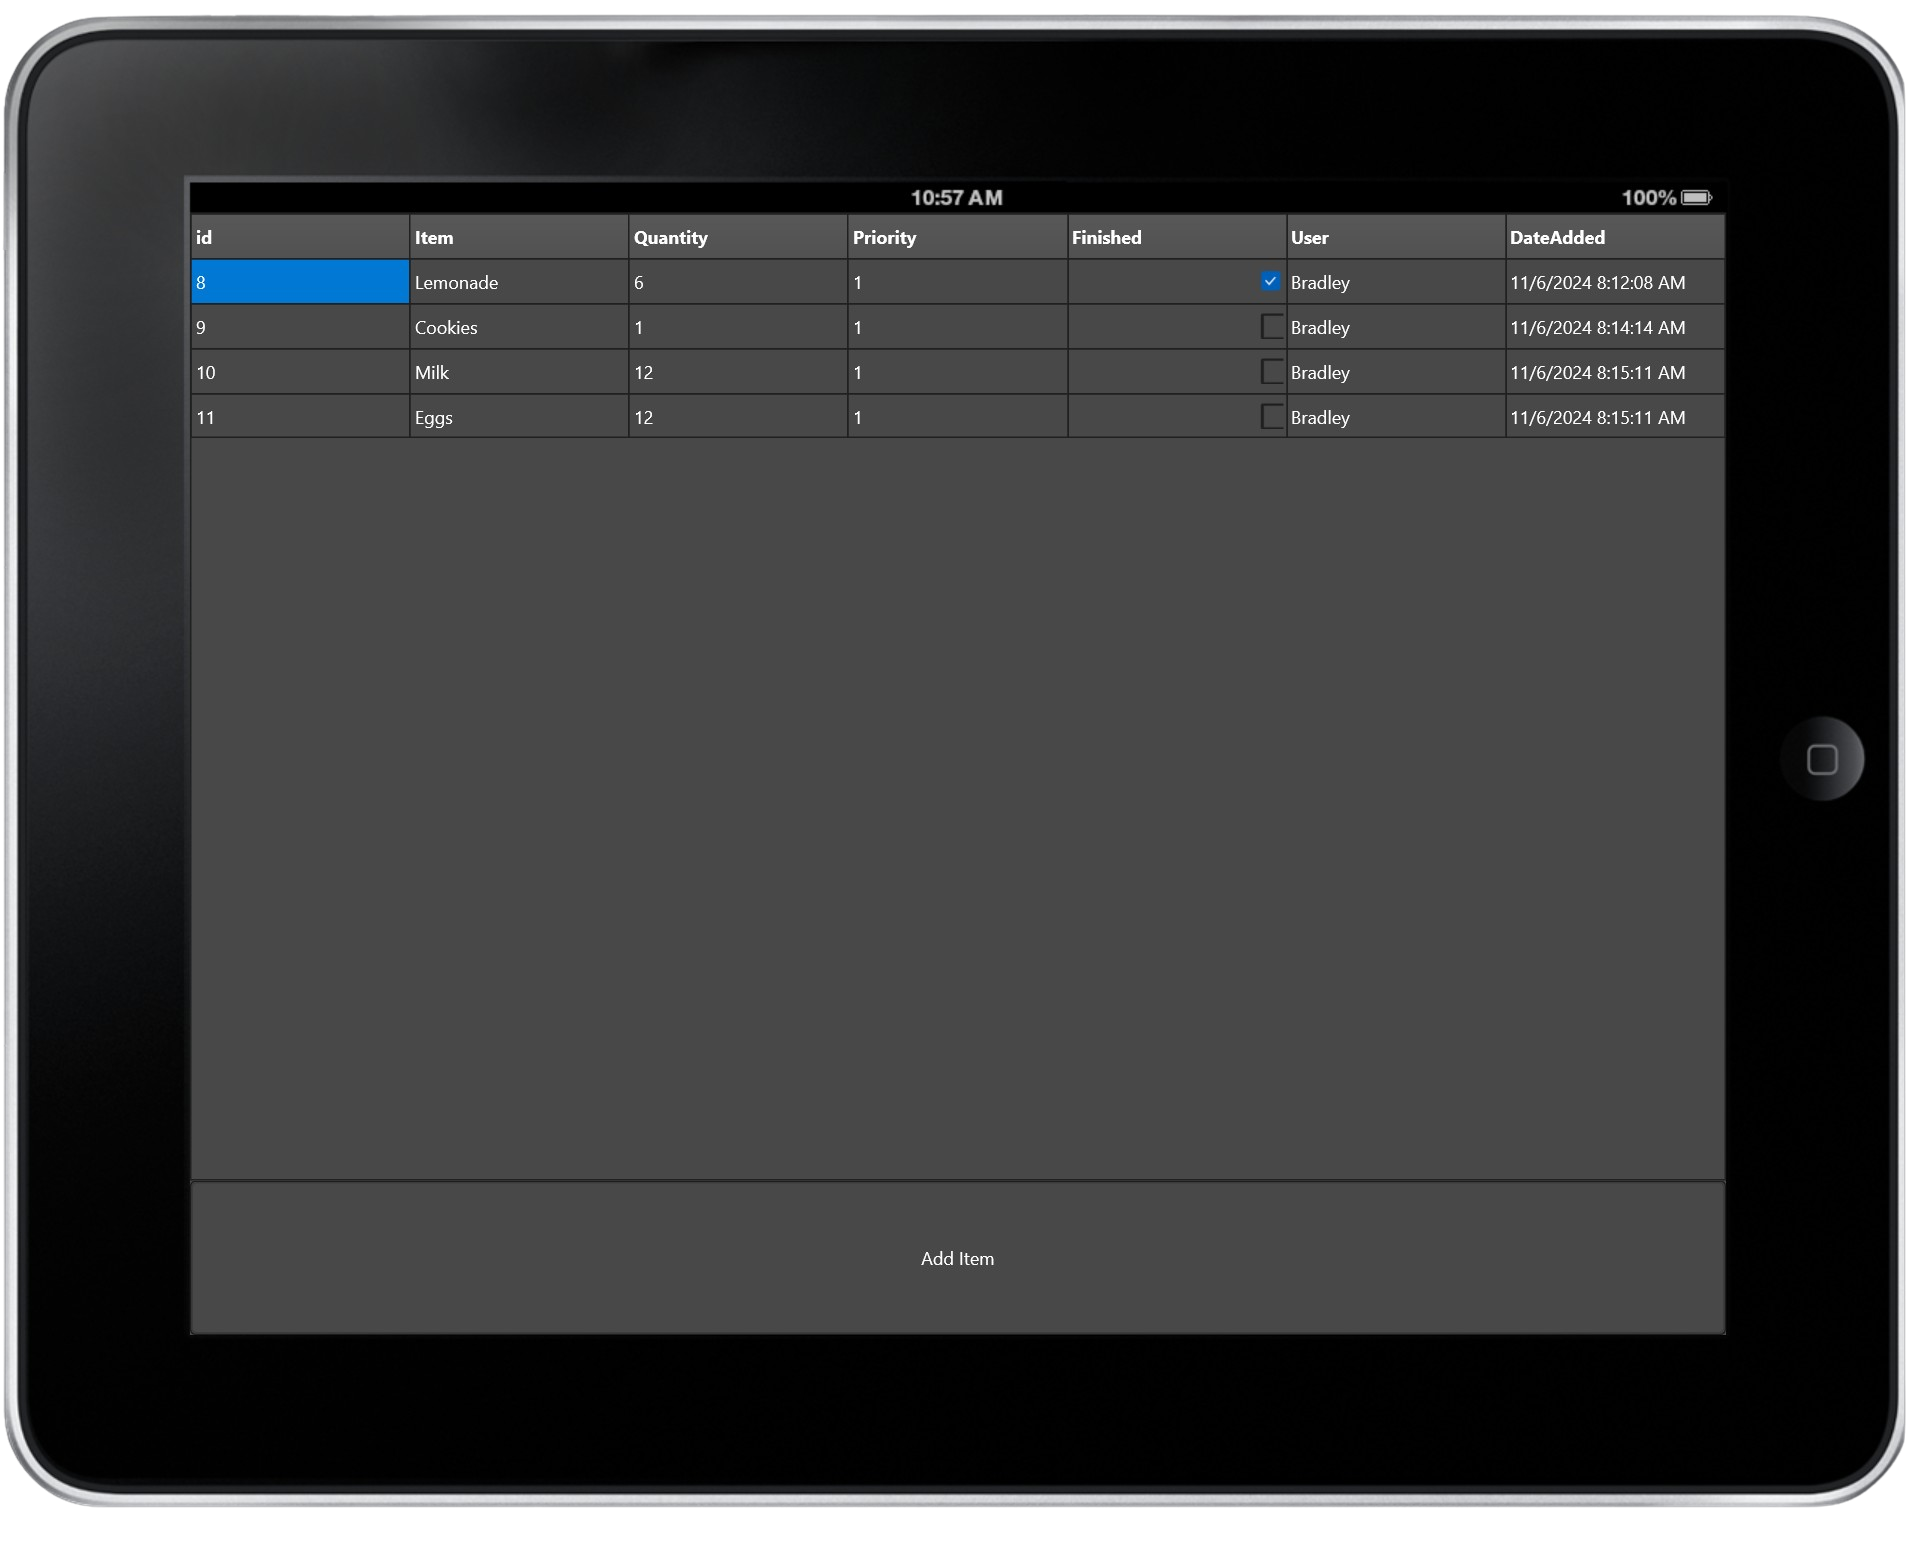
With just these few steps, we’ve created a full-stack shopping list app. And this is only the beginning—you could expand the functionality further by making the table multi-tenant to show only the user's items, or by adding permissions to restrict editing. The possibilities are endless!
Download now
To start experimenting with this demo now!

Wrapping Up
In this tutorial, we demonstrated how easy it is to create a fully functional, cross-platform shopping list app with StellarDS, TMS FNC UI Pack, and TMS FNC Cloud Pack. With just a few components and minimal lines of code, we were able to build a complete application that can connect securely to StellarDS, manage data in real time, and even adapt seamlessly to Android environments.
This setup not only showcases the efficiency of using TMS FNC components but also opens the door to endless possibilities for extending the app's functionality. From multi-tenant setups to customized permissions and collaborative features, the framework offers flexibility for almost any project requirement.
Whether you’re building a simple app or developing something more complex, these tools provide a solid foundation to create powerful, modern applications in record time. We hope this guide inspires you to explore more with StellarDS and TMS FNC, making your next project faster and more efficient than ever.
Ready?
Want to try out the latest versions of these components? Go ahead and download TMS FNC Cloud Pack and TMS FNC UI Pack or go straight ahead and get yourself the TMS FNC Component Studio which contains every pack/tool in the FNC Framework like TMS FNC Maps and TMS FNC Gantt Chart!
Follow us now!
Show us support and follow us on our social media to always be up to date about StellarDS
Bradley Velghe

This blog post has not received any comments yet.
All Blog Posts | Next Post | Previous Post
