Blog
All Blog Posts | Next Post | Previous Post

 Connecting a Delphi FireMonkey task management app to a StellarDS back-end with minimal code
Bookmarks:
Wednesday, June 26, 2024
Creating a client-side application that uses data in the cloud is no mean feat. It takes a lot of time to set up everything you need to start working with the data, from setting up a server and creating the REST API to managing your database. Luckily, we at TMS Software have just the solution for such challenges. With StellarDS, we can create a fully functioning back-end in a matter of minutes. And the best part? We have created components to consume the back-end and link them with our other components without the need to write complex and lengthy code.

To demonstrate this, we will create a fully functioning
client-side task management application using the TMS FNC Cloud Pack and TMS FNC Gantt Chart component sets to consume and connect StellarDS to
the Gantt Chart. All operations the user does in the Gantt chart will be nicely
& automatically persisted in the cloud and easily shared with other users
who might also connect from a desktop, mobile or web app to the StellarDS data
in the cloud.
Requirements
To create your own task management application, you’ll need the following products:
- TMS FNC Gantt Chart
- TMS FNC Cloud Pack
Additionally, you’ll need a Stellar DataStore account. You can set one up here.
Setting up StellarDS
To access our data, we first need to set up our StellarDS project. For this project, we will need one table with the following fields:
- projectId: NVarChar
- wbs: NVarChar
- name: NVarChar
- description: NVarChar
- plannedStart: DateTime
- plannedEnd: DateTime
- duration: NVarChar
- dependencies: NVarChar
- stateName: NVarChar
- progress: NVarChar
These fields are used by the Gantt chart to render our tasks.
Once we have our table, the next thing we will need is to generate a client ID/secret. You can read more about how to use StellarDS in this start guide.
Creating our form
For this project, we have created an FMX project. We need the following components to start creating our project:
TMSFNCCloudStellarDataStoreDataSetFMX
We will need this dataset to fetch our data and plug it into the database adapter to fill our Gantt chart with the necessary data. Double-clicking the icon on the form will open the editor. Here, you’ll need to add the client ID and secret that we generated in the last step. We will also need to specify the callback URL that we specified earlier.
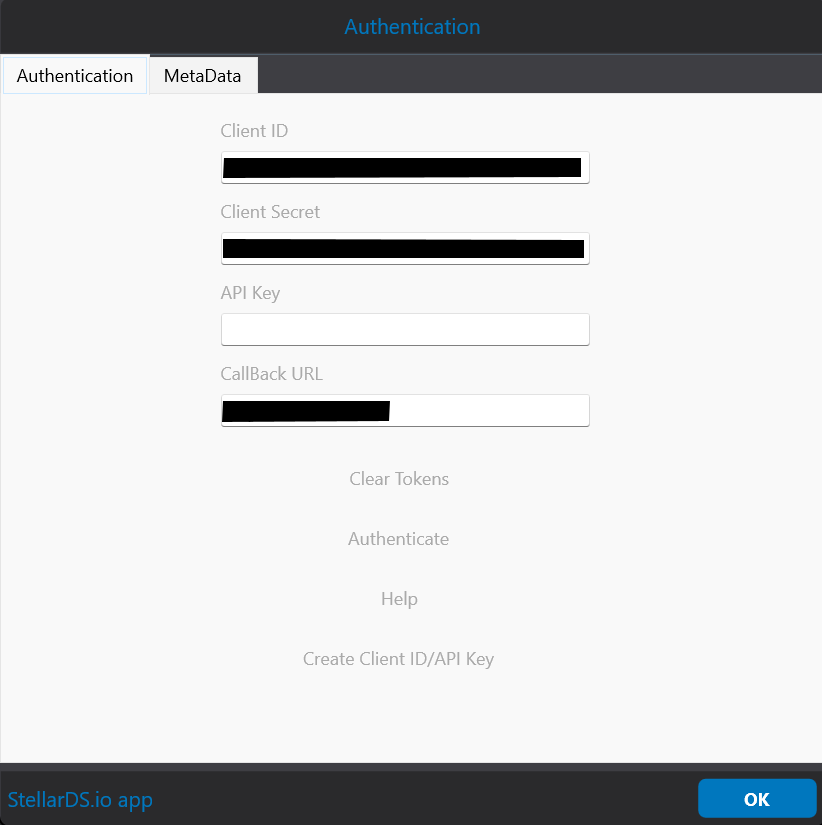
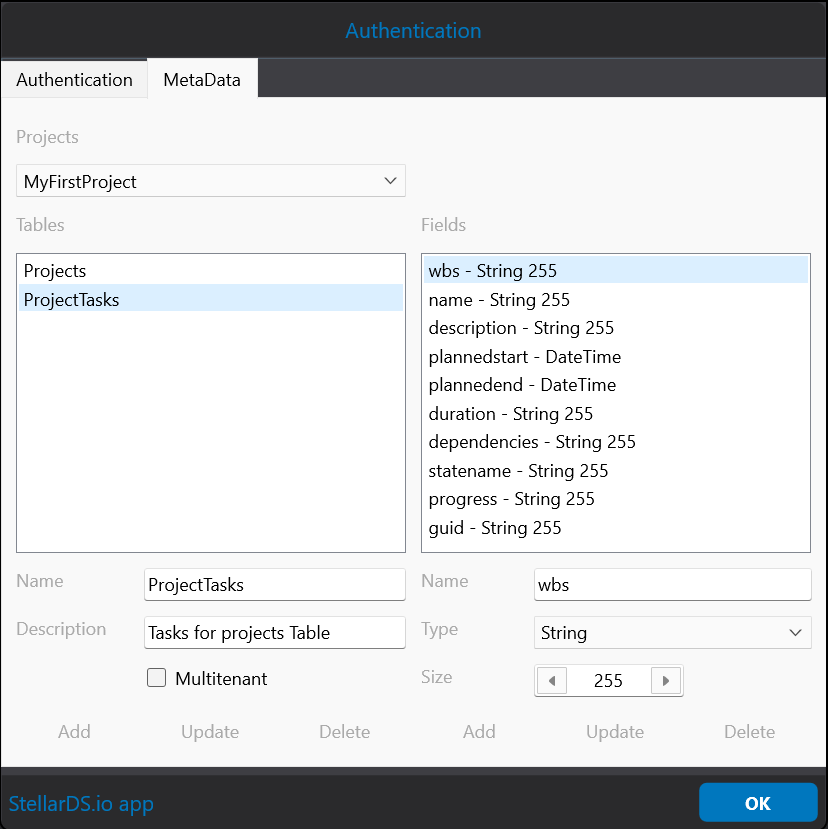
You can then click authenticate, which will bring up a sign-in screen. After a successful sign-in, navigate in the editor to the MetaData tab. You’ll see your projects, tables, and all fields for the tables. Select the table we created and click OK. A pop-up will appear asking to add the field definitions. You can just click OK, and it will add them automatically.
Set the dataset to active.
DataSource
The next step is to add a datasource and link it with the dataset we just configured.
TMSFNCGanttChartDatabaseAdapter
In this step, we will connect our DataSource to our database adapter. Set the active property to false. For this project, we will use `endTimeType` as `duration`. In the item property, add the data source and connect the fields to the item properties.
TMSFNCGanttChart
The last step is to add the TMSFNCGanttChart component to our project. We can then add our configured adapter to the Adapter property, and that’s it. We have now connected everything we need to make it work.
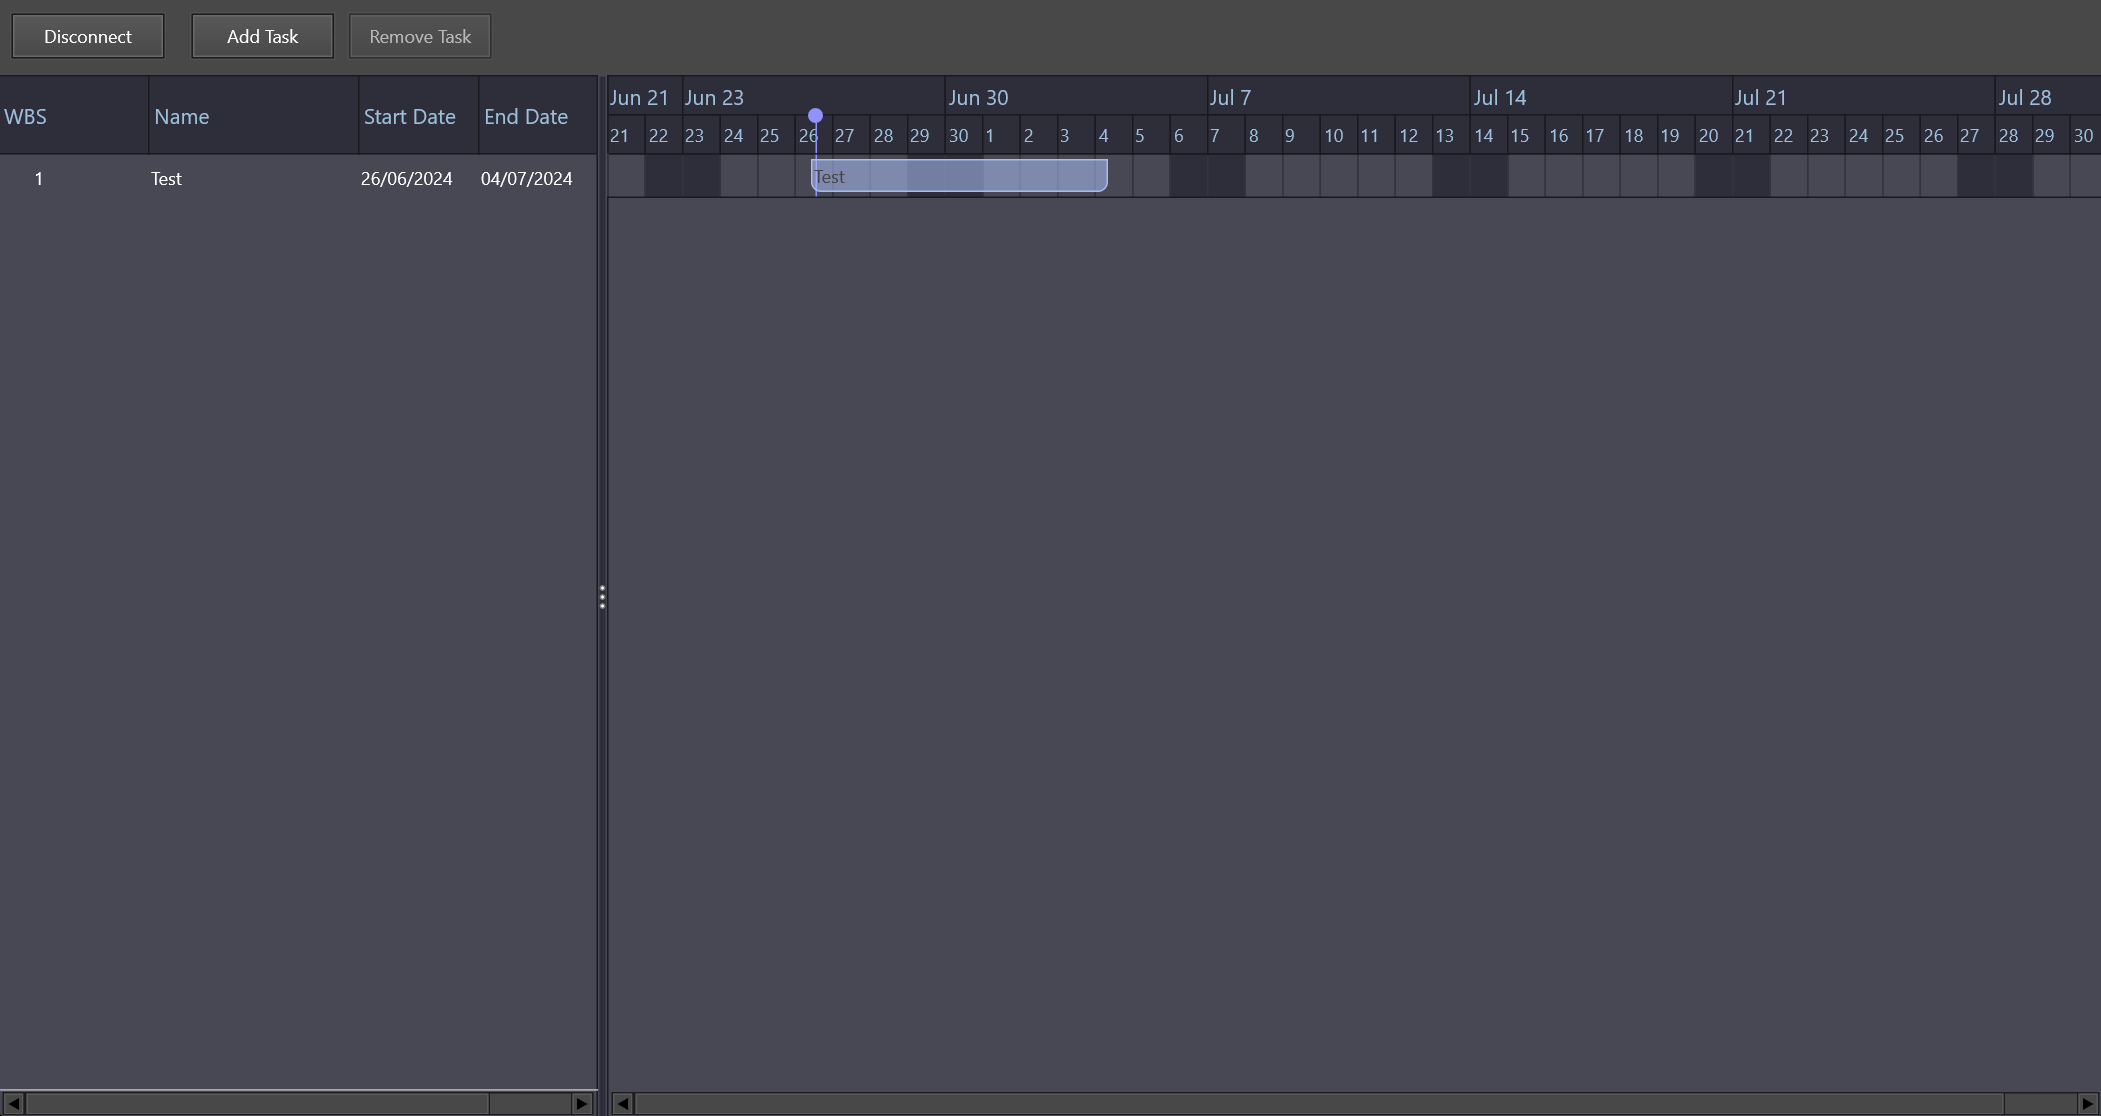
Finally, we will expand the form with two buttons, one to add tasks and one to remove tasks.
This is the final result of the form. We've added some styling and a stylebook to make it stand out more.
Code
Subscribe to the `AfterOpen` event of the Dataset and set the database adapter to active there. Because the dataset requires OAuth authentication, we need to wait for the authentication to enable the database adapter. You can use the following code here:
procedure TForm5.TMSFNCCloudStellarDataStoreDataSetFMX1AfterOpen(
  DataSet: TDataSet);
begin
   TMSFNCGanttChartDatabaseAdapter1.Active := True;
end;
The following event, `onCreateDbKey`, in the database adapter is also necessary to assign our generated task ID to the correct task.
procedure TForm5.TMSFNCGanttChartDatabaseAdapter1TaskCreateDBKey(Sender: TObject; ATask: TTMSFNCGanttTask; var ADBKey: string);
begin
  ADBKey := ATask.DBKey;
end;
We then only need to add the code to the add and remove buttons, and we are ready to go.
Add Task
TMSFNCGanttChart1.Project.AddTask('Test','db test', Now.getDate + TMSFNCGanttChart1.Project.WorkTime.WorkDayStart, 3, gdtWorkDays);Remove Task
 if Assigned(TMSFNCGanttChart1.SelectedTask) then
  begin
    TMSFNCGanttChart1.DeleteTask(TMSFNCGanttChart1.SelectedTask);
  end;
And we are ready to go. We now have a fully functional project management application with data that is shared between different users/clients. We need only a minimum amount of code to set it up.
Download the source code here!
Ready?
Want to try out the latest versions of these components? Go ahead and download TMS FNC Cloud Pack and TMS FNC Gantt Chart or go straight ahead and get yourself the TMS FNC Component Studio which contains every pack/tool in the FNC Framework like TMS FNC Maps and TMS FNC UI Pack!
Follow us now!
Show us support and follow us on our social media to always be up to date about StellarDS
|
|
|
|
|

Bradley Velghe
Bookmarks:

This blog post has not received any comments yet.
All Blog Posts | Next Post | Previous Post