Knowledge Base Alert February, 2017


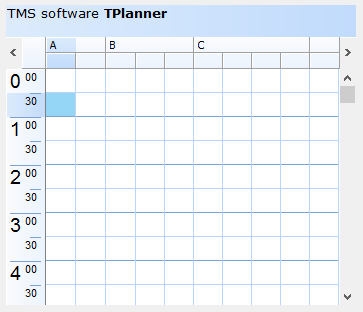
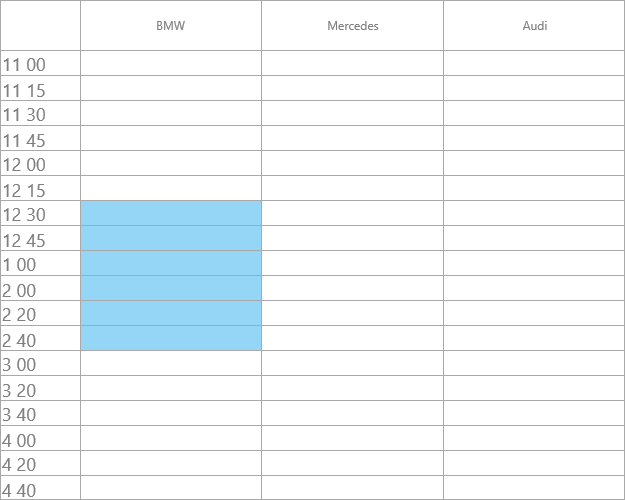
TMS TPlanner:

Adding custom groups to the Planner


Normally, when Planner.PositionGroups is set to a value and group captions are added via the Planner.Header.GroupCaptions stringlist, all groups have the same span set by Planner.PositionGroups. It is possible to add custom groups with a different position span per group. This is done via Planner.Header.CustomGroups.

Example code applied to a default Planner:

begin
  planner1.Positions := 10;
  planner1.PositionGroup := 1;

  planner1.Header.CustomGroups.Clear;

  with planner1.Header.CustomGroups.Add do
  begin
    Caption := 'A';
    Span := 2;
  end;

  with planner1.Header.CustomGroups.Add do
  begin
    Caption := 'B';
    Span := 3;
  end;

  with planner1.Header.CustomGroups.Add do
  begin
    Caption := 'C';
    Span := 4;
  end;
end;

KB89


TMS TAdvOfficePager:

Draw attention to a tab in TAdvOfficePager to make it blink.


To do this, make sure the tab is visible when it is not selected by setting AdvOfficePager1.ShowNonSelectedTabs = true and then set custom tab appearance colors for normal & selected state of the tab with:

   // make sure the default style color is used
  AdvOfficePager12.UseTabAppearance := false;
   // initialization of colors
  AdvOfficePager12.TabAppearance.Color := clRed;
  AdvOfficePager12.TabAppearance.ColorTo := clRed;
  AdvOfficePager12.TabAppearance.ColorMirror := clRed;
  AdvOfficePager12.TabAppearance.ColorMirrorTo := clRed;

  AdvOfficePager12.TabAppearance.ColorSelected := clRed;
  AdvOfficePager12.TabAppearance.ColorSelectedTo := clRed;
  AdvOfficePager12.TabAppearance.ColorMirrorSelected := clRed;
  AdvOfficePager12.TabAppearance.ColorMirrorSelectedTo := clRed;

To draw attention to the tab, now let the tab switch between the default style color and the custom color via a timer:

procedure TForm1.Timer1Timer(Sender: TObject);
begin
  if DoAttention then
    AdvOfficePager12.UseTabAppearance := not AdvOfficePager12.UseTabAppearance
 else
     AdvOfficePager12.UseTabAppearance := false;
end;


TMS Async:

Persist COM port settings of TMS Async in an INI file.


Setup the location for the INI file:

VaComm.SettingsStore.Key := '.\mycomsettings.ini'; 
VaComm.SettingsStore.Sections := 'COMPARAMS'; 
VaComm.SettingsStore.Location := slINIFile;

Do actual save & load of the settings with:

VaComm.SaveSettings;
VaComm.LoadSettings;

TMS Cloud components:

How to set the language for a synthesized text with TAdvMSBingSpeech / TMSFMXCloudBingSpeech.


How to set the language for a synthesized text with TAdvMSBingSpeech / TMSFMXCloudBingSpeech.

Use the VoiceFont parameter of the Synthesize call to change the language of the resulting audio. Besides English there are several other languages available, including German, French and Spanish. You can also choose to use a Female or Male voice.

Example:

MSBingSpeech1.Synthesize(Text, Stream, bvGermanDEFemale);

TMS WebGMaps components:

Automatically zoom the map to display all markers.


Automatically zoom the map to display all markers.

Example:

WebGMaps1.MapZoomTo(WebGMaps1.Markers.Bounds);

TMS FNC UI Pack:

TMS FNC Core & Custom Component Development


With the 1.7.1.0 release of the TMS FNC UI Pack we have introduced a TMS FNC Core separation. This means the TMS FNC Core needs to be installed as a prerequisite in order to successfully install the TMS FNC UI Pack. Apart from this separation, the new core setup will not introduce breaking changes in your application, as the file names for both the TMS FNC Core and TMS FNC UI Pack have remained the same. The separation gives us the benefit of writing components that all rely on a single core, instead of duplicating units that offer exactly the same features in multiple component sets. All current and future TMS FNC products will build upon this common core.

Custom Component Development for FNC

Now the TMS FNC Core is released, you'll have a series of units available that can be used to write custom components yourself for our FNC framework.

[FMX.][VCL.][LCL]TMSFNCBitmapContainer.pas
[FMX.][VCL.][LCL]TMSFNCCustomComponent.pas
[FMX.][VCL.][LCL]TMSFNCCustomControl.pas
[FMX.][VCL.][LCL]TMSFNCCustomScrollControl.pas
[FMX.][VCL.][LCL]TMSFNCGraphics.pas
[FMX.][VCL.][LCL]TMSFNCGraphicsTypes.pas
[FMX.][VCL.][LCL]TMSFNCHTMLEngine.pas
[FMX.][VCL.][LCL]TMSFNCStyles.pas
[FMX.][VCL.][LCL]TMSFNCTypes.pas
[FMX.][VCL.][LCL]TMSFNCURLBitmapContainer.pas
[FMX.][VCL.][LCL]TMSFNCUtils.pas

Note that with this set of units, you are able to write a custom component from scratch. A tutorial on writing a custom component can be found in this blog post: http://www.tmssoftware.com/site/blog.asp?post=346

TTMSFNCPlanner:

How to configure TTMSFNCPlanner with a custom time line


There are 2 ways you can achieve this. You can add a disabled range of dates that cannot be selected, but they will be visible. You can achieve this by implementing the OnIsDateTimeDisabled event.

The second way is to use the pmCustom planner mode that can be used in combination with CustomDateTimes list as demonstrated in the following sample.

TMSFNCPlanner1.BeginUpdate;

TMSFNCPlanner1.Mode := pmCustom;
for I := 0 to 8 do
  TMSFNCPlanner1.CustomDateTimes.Add(IncMinute(EncodeDateTime(2017, 2, 22, 11, 0, 0, 0), 15 * I));

for I := 0 to 9 do
  TMSFNCPlanner1.CustomDateTimes.Add(IncMinute(EncodeDateTime(2017, 2, 22, 14, 0, 0, 0), 20 * I));

TMSFNCPlanner1.TimeLine.DisplayUnitFormat := 'h mm AMPM';

TMSFNCPlanner1.TimeLineAppearance.LeftSize := 80;

TMSFNCPlanner1.EndUpdate;


KB90


TTMSFNCPlanner:

Programmatically changing the scroll position in the TTMSFNCPlanner


You can programmatically change the vertical scroll position with:

  TMSFNCPlanner1.VerticalScrollBar.Position := scrollpos
If the Planner can also scroll horizontal, the horizontal scroll position can be changed with:

  TMSFNCPlanner1.HorizontalScrollBar.Position := scrollpos;

TMS MQTT:

Sending and receiving images with TMS MQTT.


The following code shows you how to send a selected image to a specific topic on the broker:

procedure TMQTTExampleForm.SetProfilePictureButtonClick(Sender: TObject);
var
  fs: TFileStream;
  payload: TBytes;
begin
  SelectProfileImageDialog.Filter := 'JPG images|*.jpg';
  if (SelectProfileImageDialog.Execute) then
  begin
    fs := TFileStream.Create(SelectProfileImageDialog.FileName, fmOpenRead);
    try
      SetLength(payload, fs.Size);
      fs.Read(payload[0], fs.Size);
      MQTTClient.Publish('myapp/profile/image', payload);
    finally
      fs.Free;
    end;
  end;
end;
On the receiving end, this code snippet can be used to get the file and save it back to the file system:

procedure TMQTTExampleForm.PublishReceived(ASender: TObject; APacketID: Word; ATopic: string; APayload: TBytes);
var
  fs: TBytesStream;
begin
  if (ATopic = 'myapp/profile/image') then
  begin
    fs := TBytesStream.Create(APayload);
    try
      fs.SaveToFile('c:\temp\mqtt\profile-image.jpg');
    finally
      fs.Free;
    end;
  end;
end;


As always, we thank all users for the numerous inputs, feedback, comments and suggestions. This is an invaluable help to steer our developments here at TMS software. We continue to look forward to all your further communications to direct our team to provide you better tools and components for your needs.

Kind regards,
TMS software team
Email: info@tmssoftware.com
Web: http://www.tmssoftware.com
Support, FAQ & Manuals: http://www.tmssoftware.com/site/support.asp


Follow latest developments at tmssoftware.com


NOTICE: If you wish to unsubscribe from the TMS software Newsletter, please click here.